# ACR
Azure Container Registry (ACR) is a fully-managed, private container registry service provided by Microsoft Azure. It is designed to store and manage container images and artifacts used in containerized application development and deployment. ACR integrates seamlessly with Azure's ecosystem and other tools, making it a vital component of cloud-native development workflows.
### Usage of ACR in Delivery Shield:
* Delivery Shield gets notified for every build run in a pipeline. To identify the image for every build, it connects to the ACR repo and pulls the newly built image.
* Once the image is pulled, it runs security scans on it. The scanned results are available in the[ Vulnerability Management](https://docs.opsmx.com/opsmx-secure-software-delivery-ssd-platform/user-guide/vulnerability-management) page, and Artifact section of the [DBOM](https://docs.opsmx.com/opsmx-delivery-shield-platform/user-guide/view-security-posture/application-security-posture/dbom) page.
### To Integrate ACR:
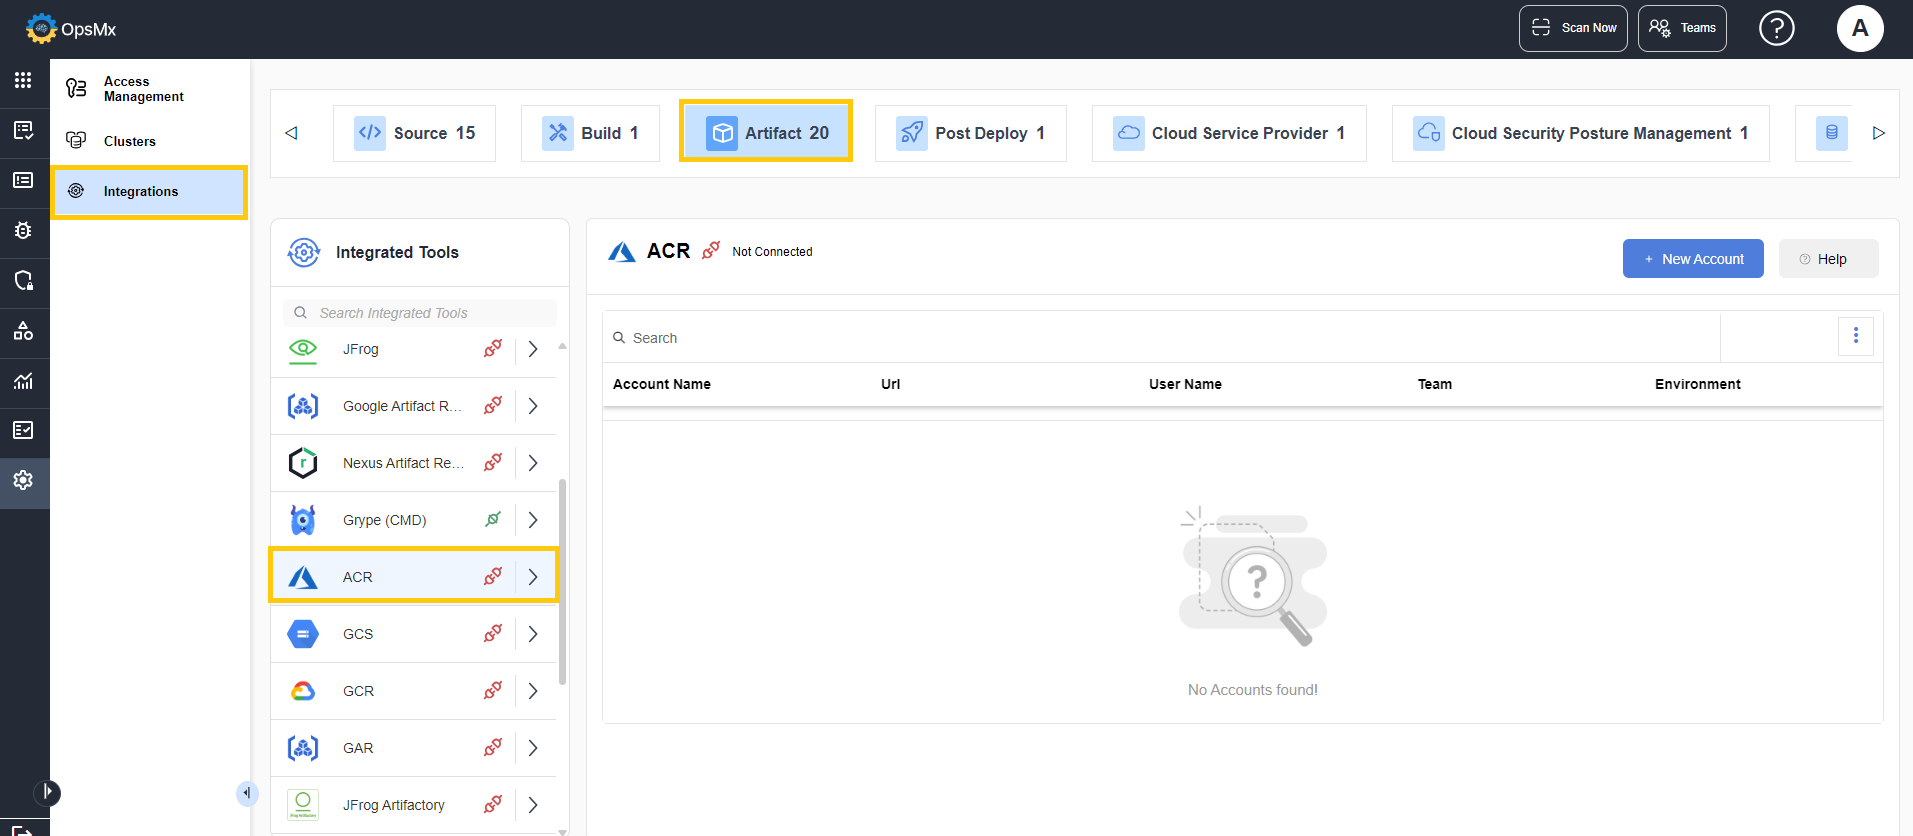
1. Navigate to **Setup** > **Integrations**.
2. Click the Artifact tab. In the artifacts that appear, click ACR.
The ACR integration page is displayed. Click **+New Account**.
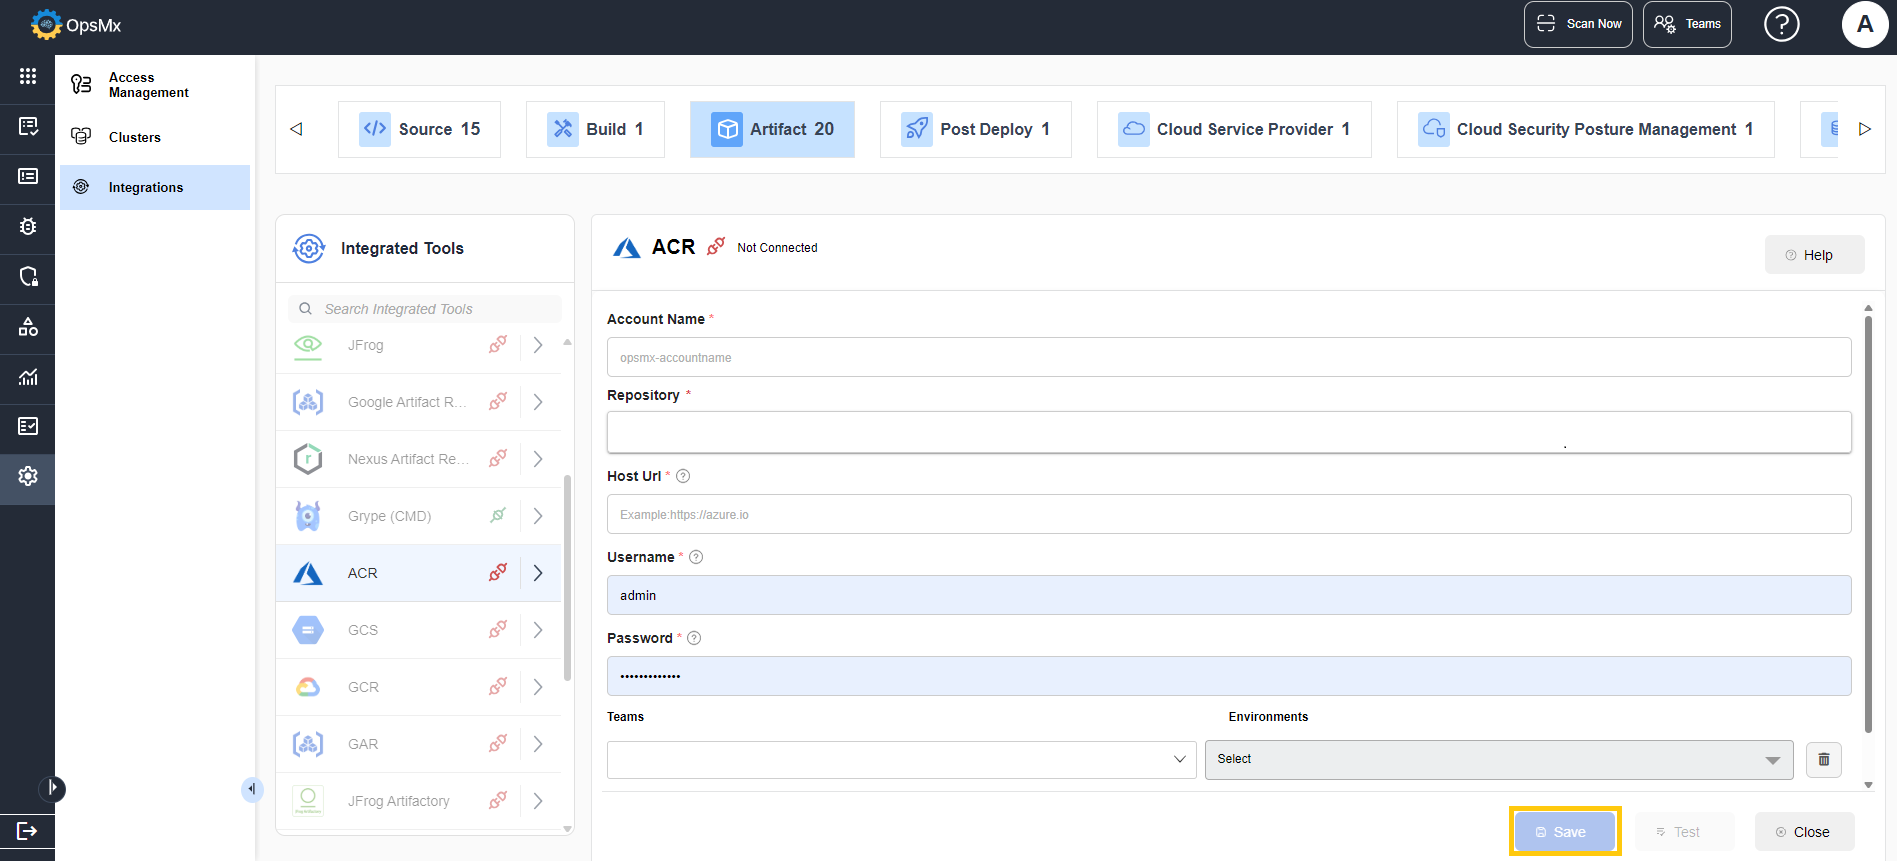
3. In the popup that appears, enter the details for the following:
* **Account Name** - The name of the user account.
* **Repository**- The name of the approved artifact repository from which the images are deployed. Security issues are raised by SSD if you try to deploy images from a different repository.
* **Host Url** - The host Url link.
* **Username** - The username to access the account.
* **Password** - The password to access the account.
* Select the **Teams** and the corresponding **Environments** from the dropdown for which you want the integration to be available. The integration will be available for the selected teams and environment only.
You can select up to 5 teams for the integration to be displayed.
* An example is given below for reference:
* In the example above,
* if **Team 1**, **Team 2**, and **Team 3** are selected, only applications associated with these teams can access the integration. Any applications belonging to other teams, such as **Team 4**, will not have access to this account.
* Even if the user who created this account is also an admin for **Team 4**, the integration account remains restricted and is not available for **Team 4**.
* Access to the account is strictly limited to the specified **Teams** and **Environments** selected during account creation.
* **For Organization Admins:**
* When an **Organization Admin** creates an account without selecting specific **Teams** and **Environments**, the account will be universally applicable, granting access to **all teams** and **all environments** by default.
* **For Team Admins with Multiple Teams:**
* If a **Team Admin** who manages multiple teams creates an account without specifying particular **Teams** and **Environments**, the account will only be accessible to the teams for which the logged-in user holds admin privileges.
5. Click **Test** to check if the entered values are valid. If the given values are valid, a popup appears at the top as shown below indicating it.
6. Once validated, click **Save**. The ACR account gets integrated in the artifact stage.
7. To edit the entered values, click on the three dots provided in the **Actions** column. In the dropdown select **Edit**.
8. Re-enter the new values and click Update.
The new values get updated.