> For the complete documentation index, see [llms.txt](https://docs.opsmx.com/llms.txt). Markdown versions of documentation pages are available by appending `.md` to page URLs; this page is available as [Markdown](https://docs.opsmx.com/isd-spinnaker/opsmx-intelligent-software-delivery-isd-platform-spinnaker/user-guide/manage-pipelines/execute-pipelines-run-deployments/deployment-to-kubernetes-namespace-with-manifest-file.md).
# Deployment to Kubernetes namespace with Manifest file
A Kubernetes manifest is a text file that details a deployment. Deploying a Kubernetes Manifest using Spinnaker is easy and has out-of-the-box stages when you build your pipelines.
To deploy a manifest from ISD follow the steps below:
1. **Go to** [**Application Dashboard**](https://docs.opsmx.com/user-guide/dashboard/application-dashboard): When you log in to ISD the application dashboard is displayed with the list of applications. You can create a new application also as given in [**create a new application**](https://docs.opsmx.com/release-history/previous-releases/isd-4.0/knowledge-base/manage-application/create-an-application).
2. Click on the application for which you want to build this pipeline.

2\. **Pipelines:** Once you click on an application, it will redirect you to the **Pipelines** page. Click **+Create** button to [**create a new pipeline**](https://docs.opsmx.com/release-history/previous-releases/isd-4.0/knowledge-base/manage-pipelines/create-a-pipeline). Users can also view the existing pipelines displayed on the left.
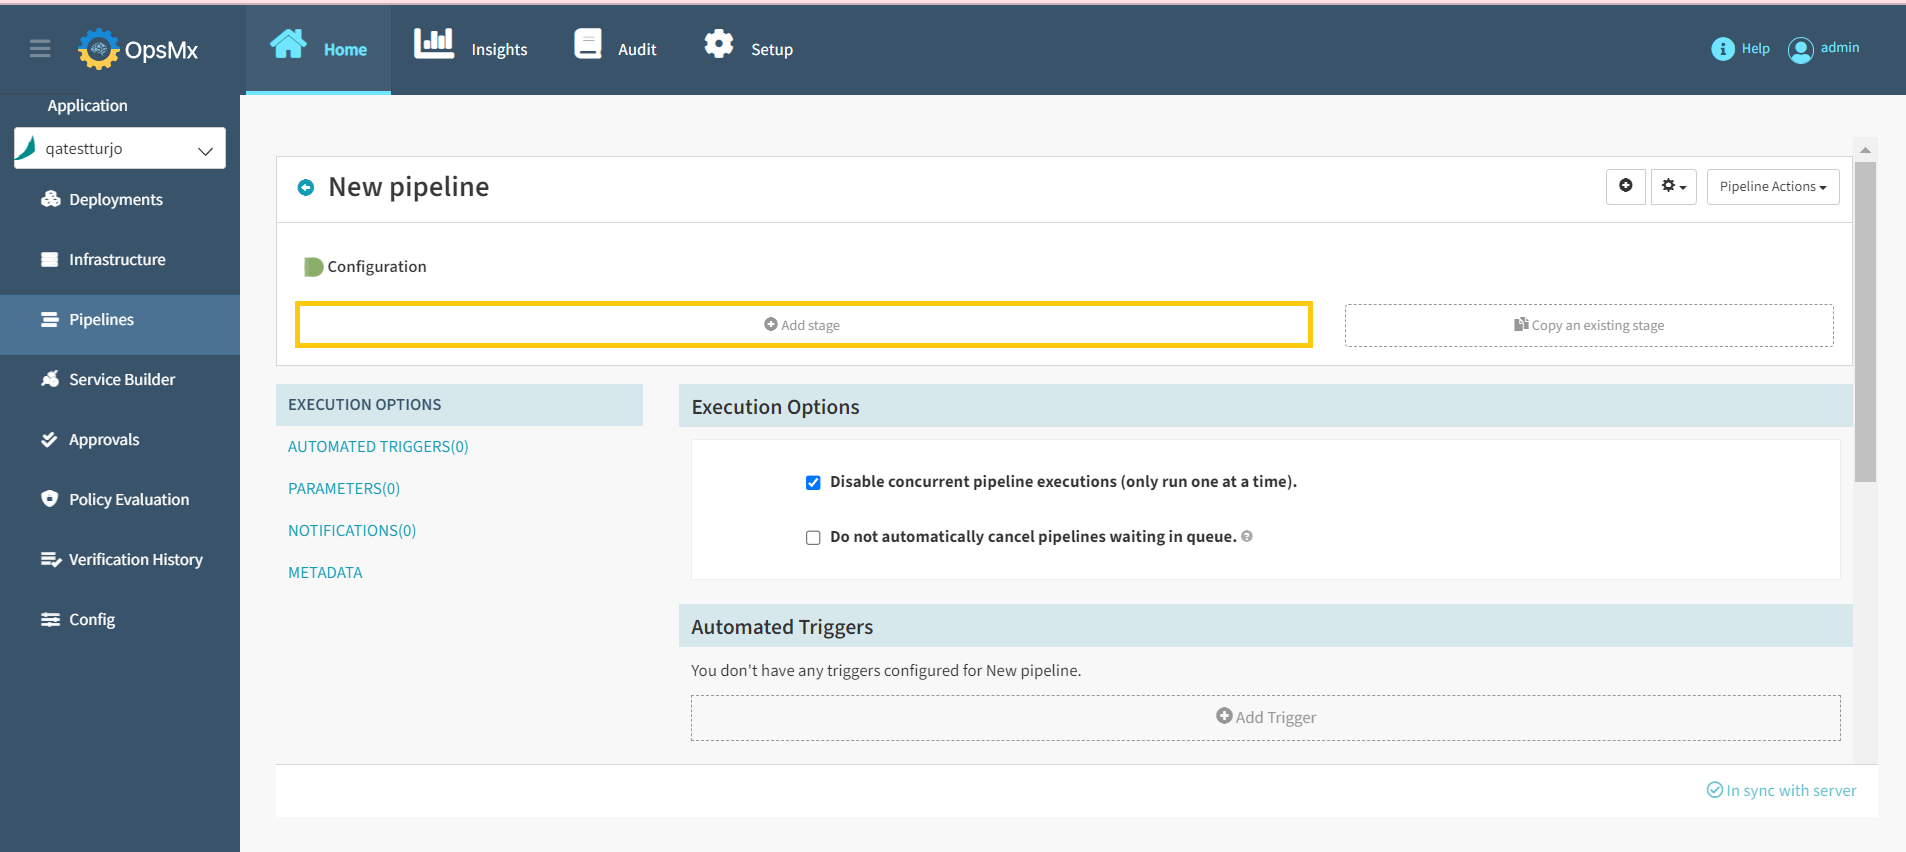
3\. **Click on** [**Add stage**](https://docs.opsmx.com/user-guide/manage-pipelines/add-stage)**:** The add stage button is displayed below the diagrammatic representation of the created pipeline. When you click this button, you can select the different types of stages that ISD supports.
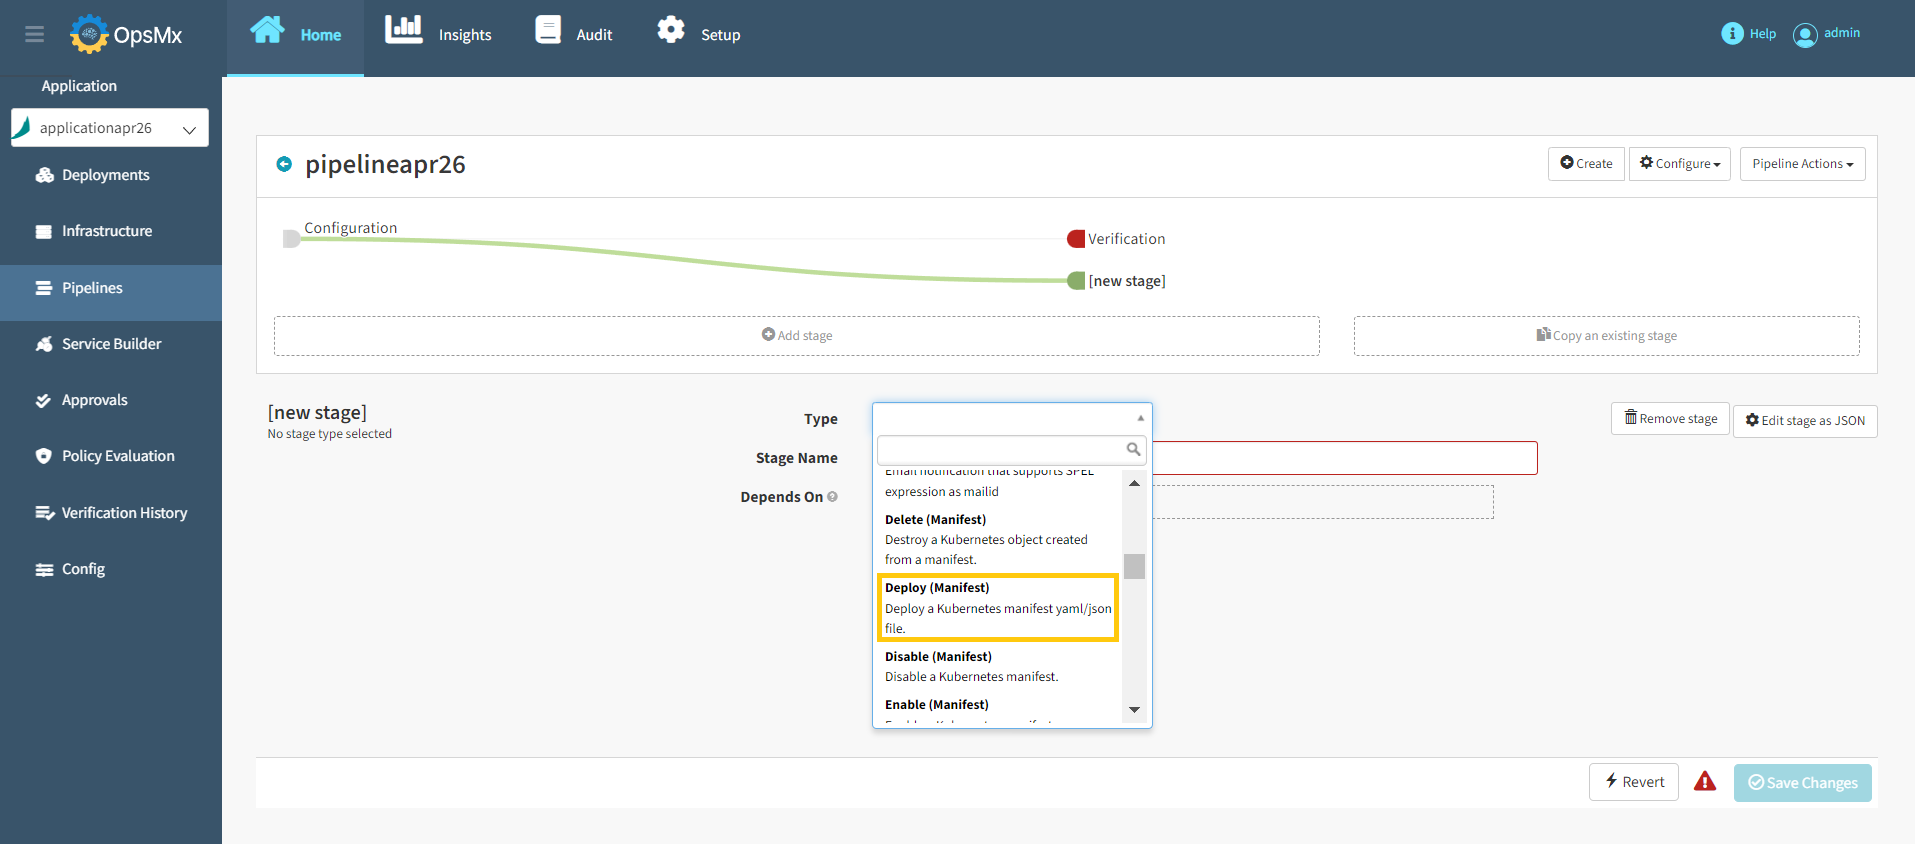
4\. **Select Deployment**: You can add a host of different stages from the **Type** drop down. They are all alphabetically sorted. Scroll down and select **Deploy(Manifest)**.
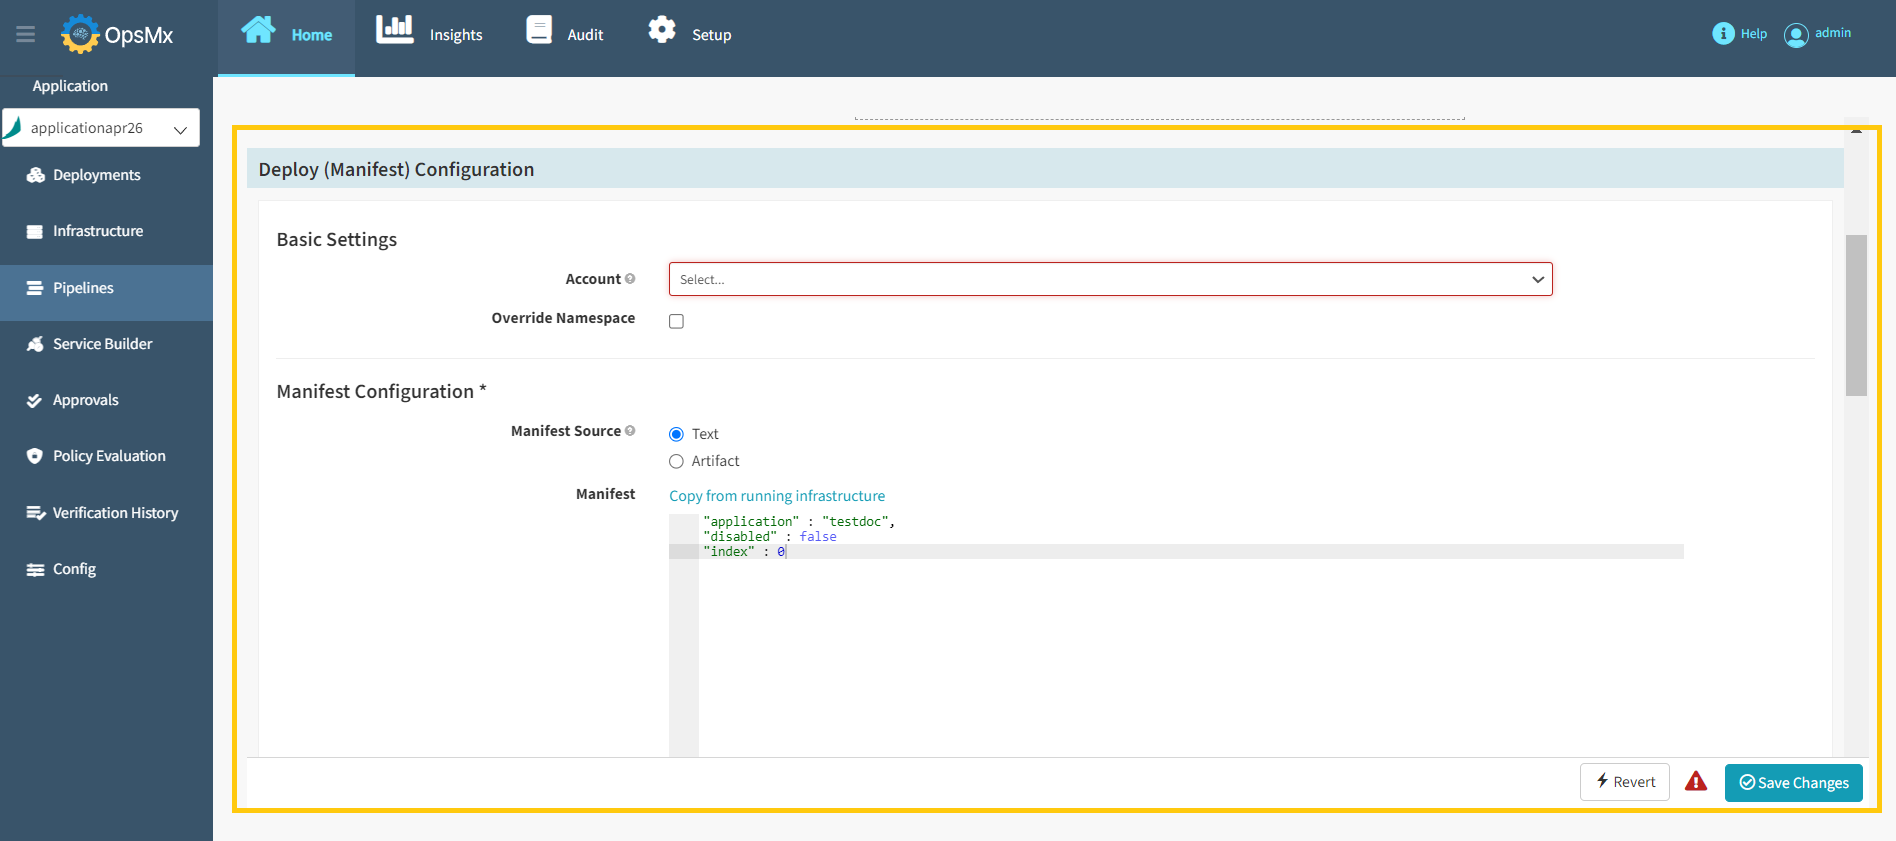
5\. **Select your account**: An account is a name given to a Kubernetes cluster.
6\. **Select your namespace**: A namespace is a specific address within a Kubernetes cluster, select the checkbox that says **Override Namespace** and you will be able to select the namespace in which your manifest will deploy.
7\. **Add your manifest**: Kubernetes manifests are in YAML, which means you can store them as basic text objects and copy and paste them as needed, or you can store them as an artifact in a Git repository and configure the pipeline to fetch them from that repository. Select the **Text** option as a manifest source and **add your manifest** as shown.
8\. After adding your manifest, Click on **Save Changes** to deploy your manifest.