> For the complete documentation index, see [llms.txt](https://docs.opsmx.com/llms.txt). Markdown versions of documentation pages are available by appending `.md` to page URLs; this page is available as [Markdown](https://docs.opsmx.com/isd-spinnaker/opsmx-intelligent-software-delivery-isd-platform-spinnaker/user-guide/manage-pipelines/add-intelligent-gates-to-the-pipeline/verification-gate.md).
# Verification Gate
### Verification Gate
An approval gate stops the pipeline and waits for approval either from a human user or from a computer based on data from a supported plugin.
You can add a **Verification** Gate after creating a pipeline to the application. To add a **Verification Gate** follow the steps below:
If you haven’t created an application already, click [**here**](https://docs.opsmx.com/release-history/previous-releases/isd-4.0/knowledgebase/manage-application/create-an-application)**.**
If you haven’t created your pipelines yet, click [**here**](https://docs.opsmx.com/release-history/previous-releases/isd-4.0/knowledgebase/manage-pipelines/create-a-pipeline)**.**
1. From the [**Application dashboard**](https://docs.opsmx.com/user-guide/dashboard/application-dashboard), select your application name which you need to edit a pipeline. Click **Three dots** at end of the application name and then select "[**Edit Pipeline**](https://docs.opsmx.com/user-guide/manage-pipelines/edit-pipeline)" as shown in the image below.

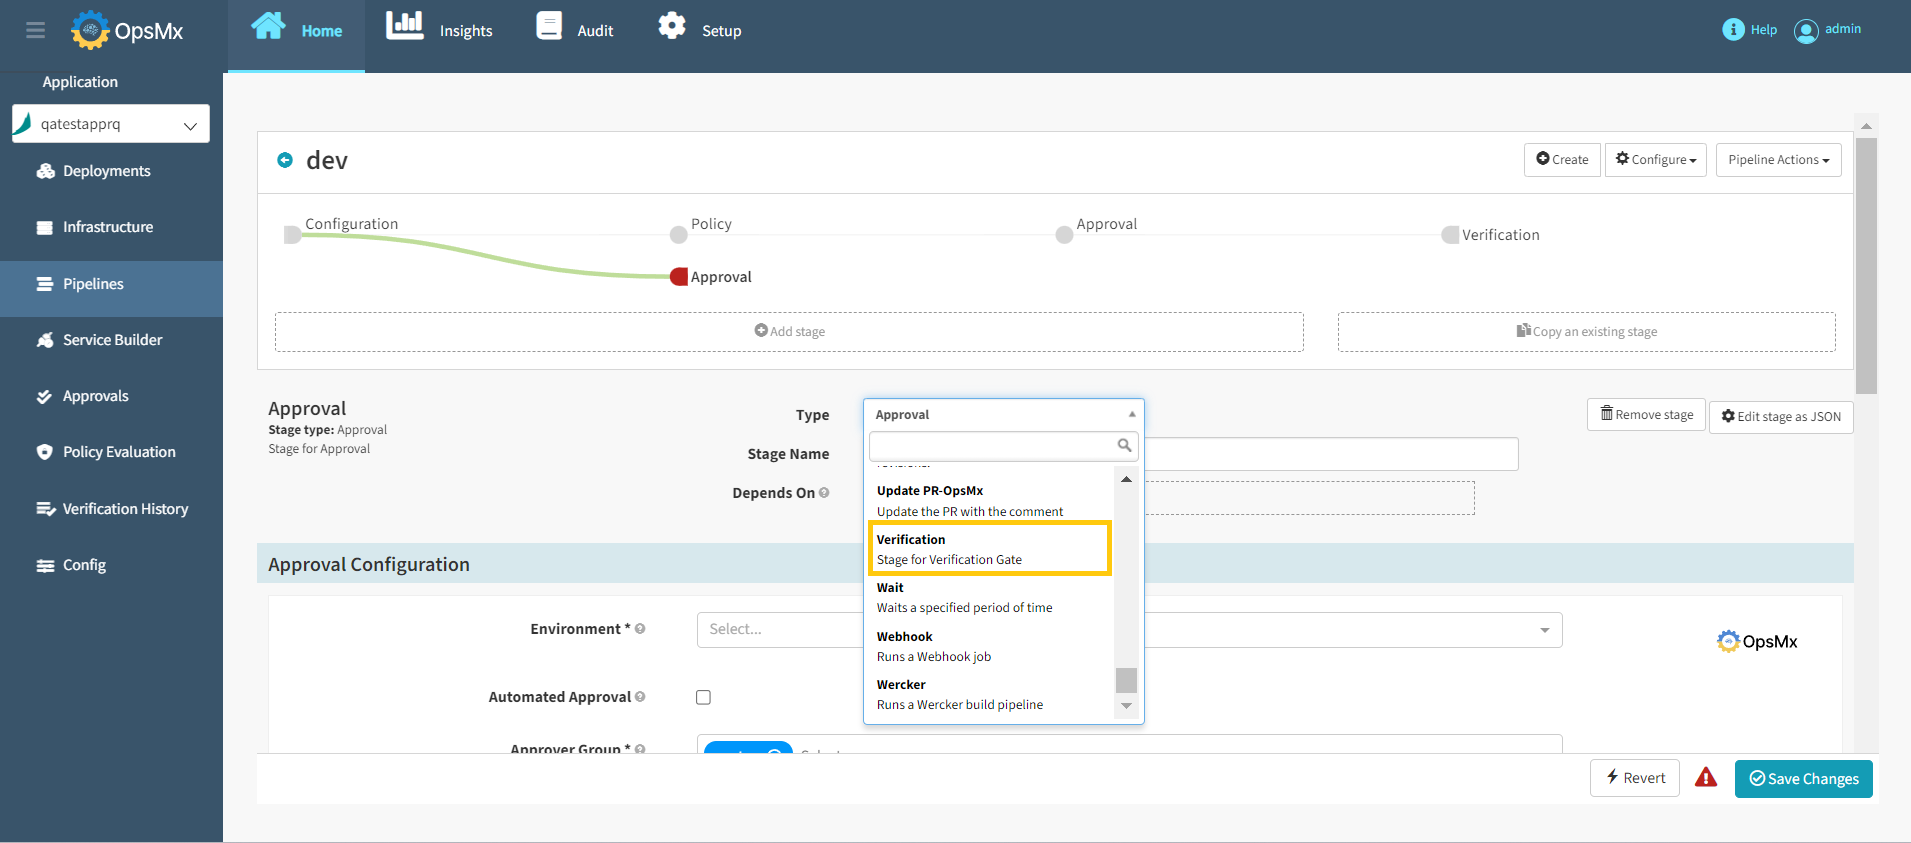
2\. The **Pipelines** page appears, where you need to add the Approval Stage. Click [**Add Stage**](https://docs.opsmx.com/user-guide/manage-pipelines/add-stage)**,** select **Verification** from the **Type** drop-down as shown in the image below.
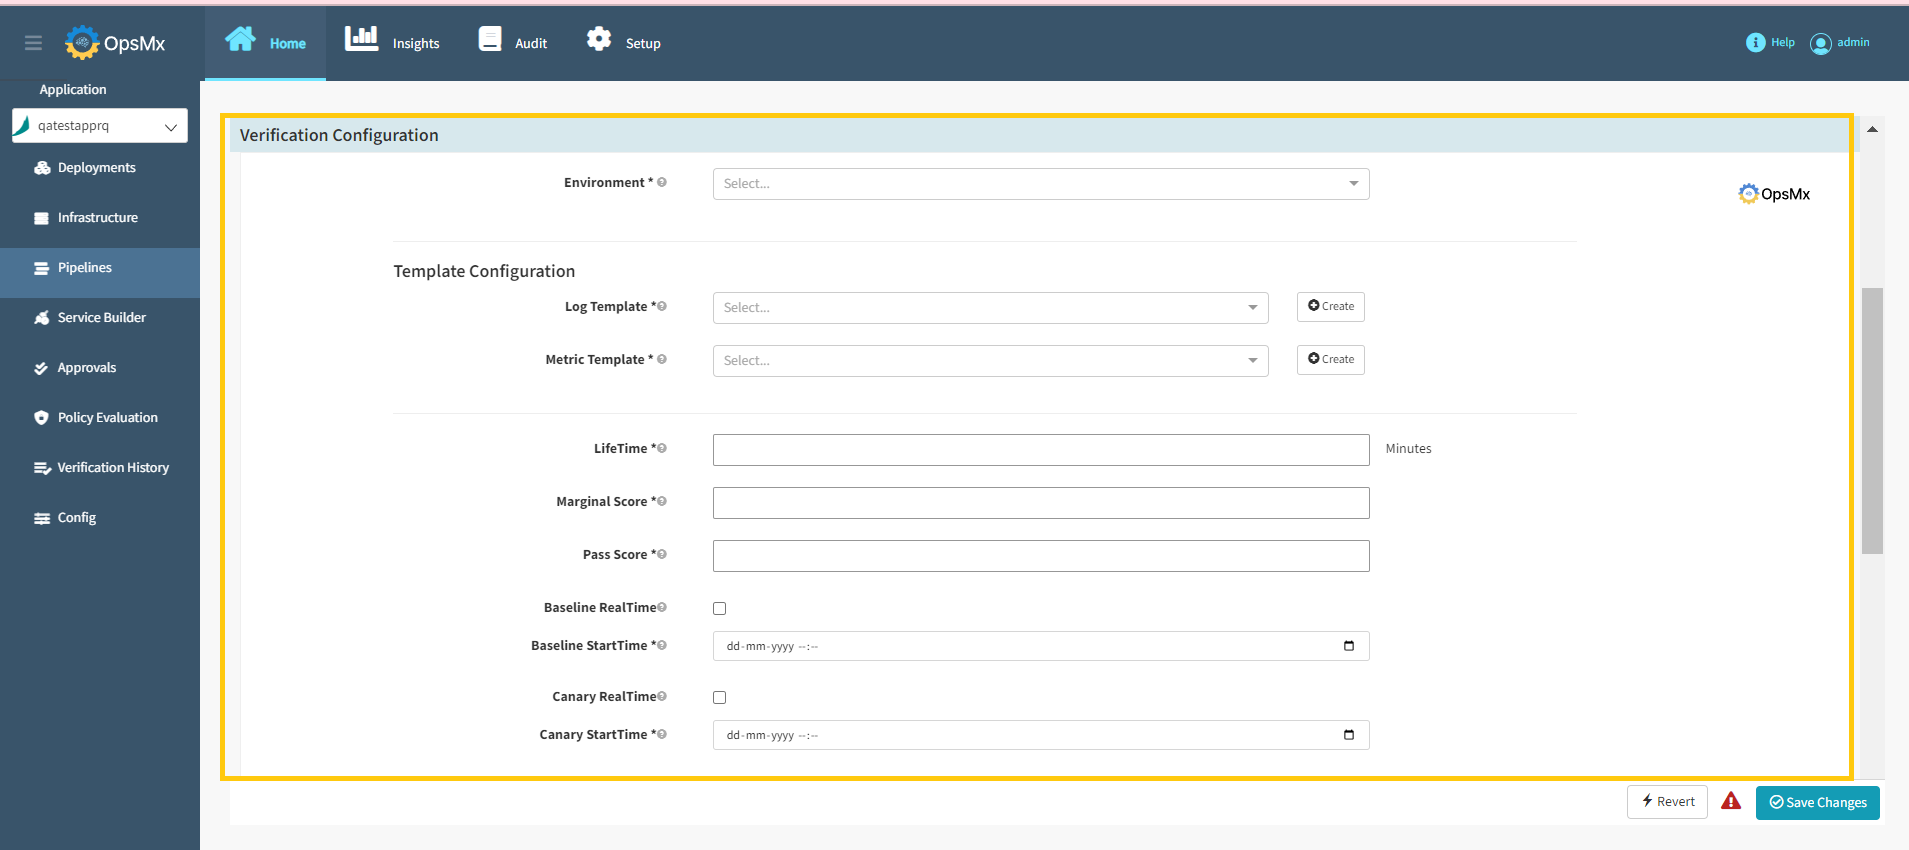
3\. The **Verification Configuration** page appears. You need to configure the verification gate with the attributes as shown in the image below:
* **Verification configuration attributes**
* **Environment**: Select your environment from the drop-down menu
* **Log Template**: Select or Create Log Template
* **Metric Template**: Select or Create Metric Template
* **LifeTime**: Minutes to let the analysis run before making a final determination
* **Marginal Score**: If the score is equal to or higher than the Marginal but lower than the Pass Score, **Review** status is shown in the Analysis screen
* **Pass Score**: If the Score equal to or higher than Pass Score, the stage will Pass
* **Baseline Real Time**: Start time of stage execution will be taken as Baseline Start time
* **Baseline Start Time**: Baseline Start Time for the analysis
* **Canary Real Time**: Start time of stage execution will be taken as Canary Start time
* **Canary Start Time**: Canary Start Time for the analysis
6\. Click **Save changes** and the Verification Gate is added to your pipeline.