> For the complete documentation index, see [llms.txt](https://docs.opsmx.com/llms.txt). Markdown versions of documentation pages are available by appending `.md` to page URLs; this page is available as [Markdown](https://docs.opsmx.com/isd-spinnaker/opsmx-intelligent-software-delivery-isd-platform-spinnaker/user-guide/informed-approval/autopilot.md).
# Verification
Let’s learn how to configure visibility for **Verification**. It is an Integration for ISD application, an external data source from where ISD would pick the data for that would be used for taking informed decisions.
Following are the steps:
1. Add / Edit application & its respective services. [**Refer to this page**](https://docs.opsmx.com/user-guide/manage-application) to know how to add / edit applications.
2. Add **Autopilot** as an Integration to the ISD system. [**Refer to this page**](https://docs.opsmx.com/user-guide/data-sources) to learn how to add an Integration.
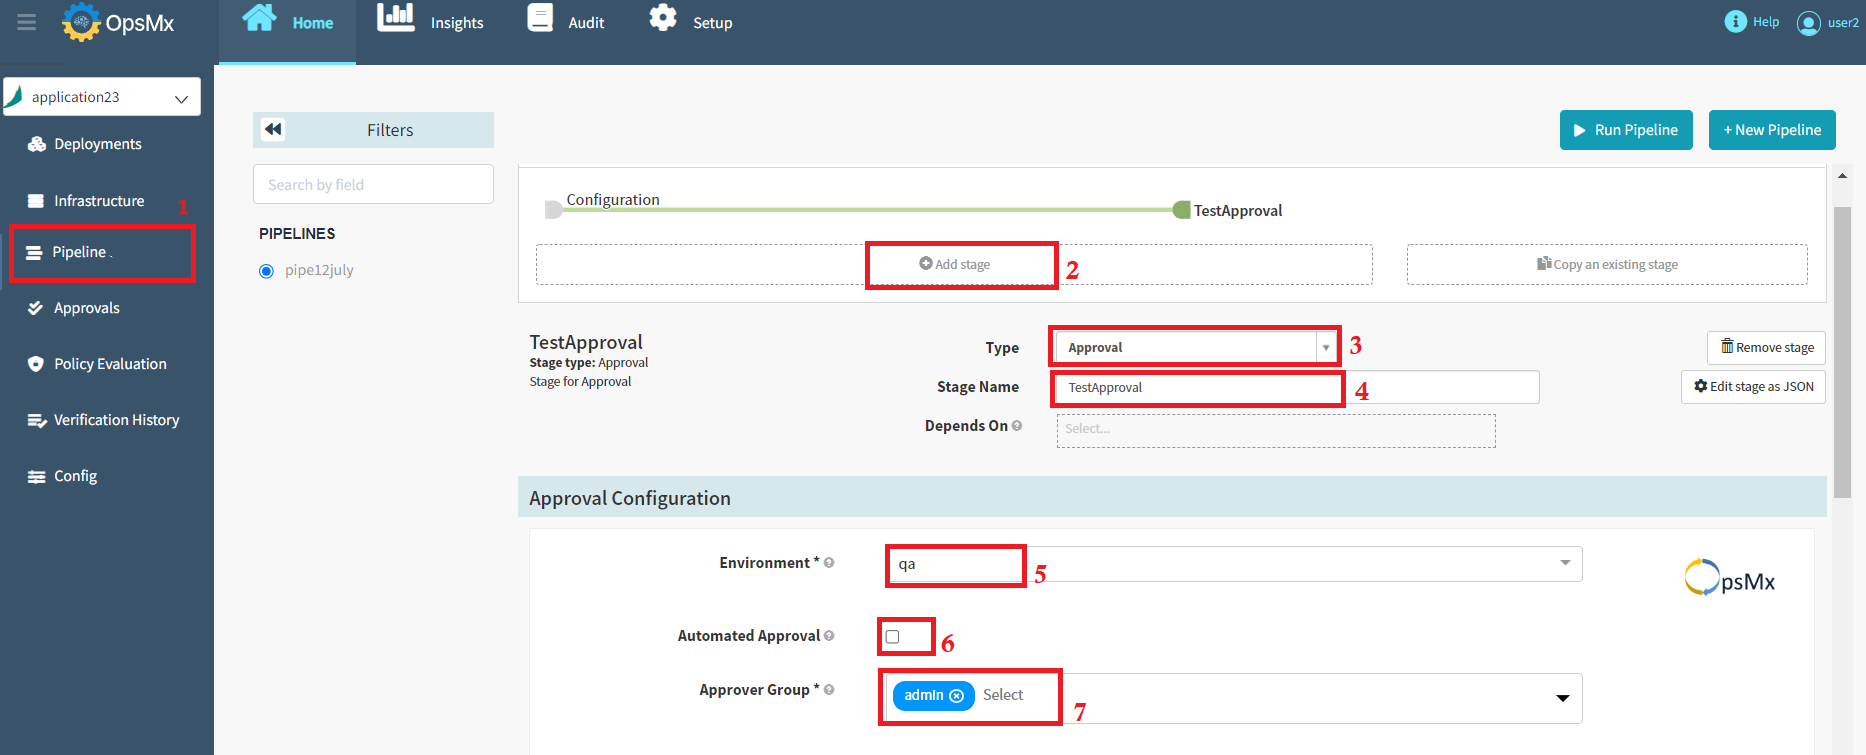
3. Next, click on your application and go to the **pipeline builder** page. Here you can add and configure the multiple stages into the pipeline.
4. Click on "[**Add Stage**](https://docs.opsmx.com/user-guide/manage-pipelines/add-stage)" select the stage type as **Approval,** and enter the **stage name.** Here we have given the gate name "TestApproval".
5. Select the **Environment** from the drop-down menu and select the **approver group** from the drop-down menu, which contains the list of user groups who can approve the request. The selected group should have at least view access to the application.\
If required, select the **Automated Approval** option, which will automatically approve the deployment based on preconfigured conditions.
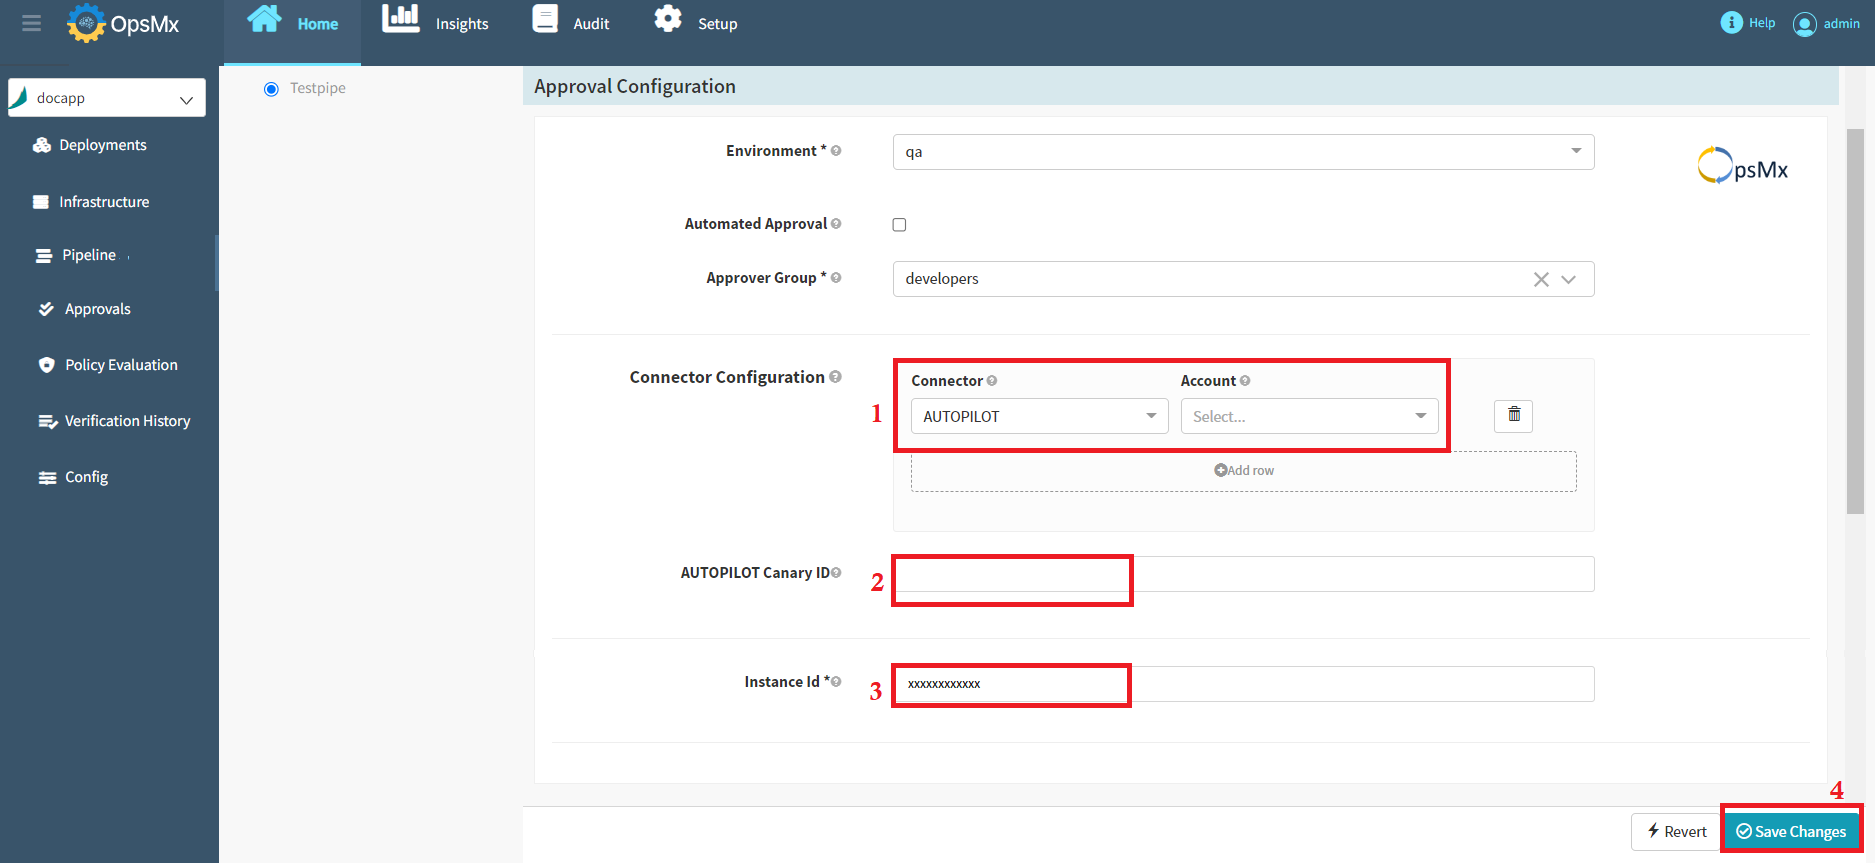
6\. Select the "**Verification"** connector from the connector drop-down menu and select the "**Account**" from the drop-down menu.
7\. Enter the **Project Key, Branch Name** and **instance ID** on the above screen and then click "**Save Changes**".