> For the complete documentation index, see [llms.txt](https://docs.opsmx.com/llms.txt). Markdown versions of documentation pages are available by appending `.md` to page URLs; this page is available as [Markdown](https://docs.opsmx.com/isd-spinnaker/opsmx-intelligent-software-delivery-isd-platform-spinnaker/user-guide/data-sources/available-integrations/pub-sub-subscription-name.md).
# Pub/Sub Subscription Name
### PUBSUB
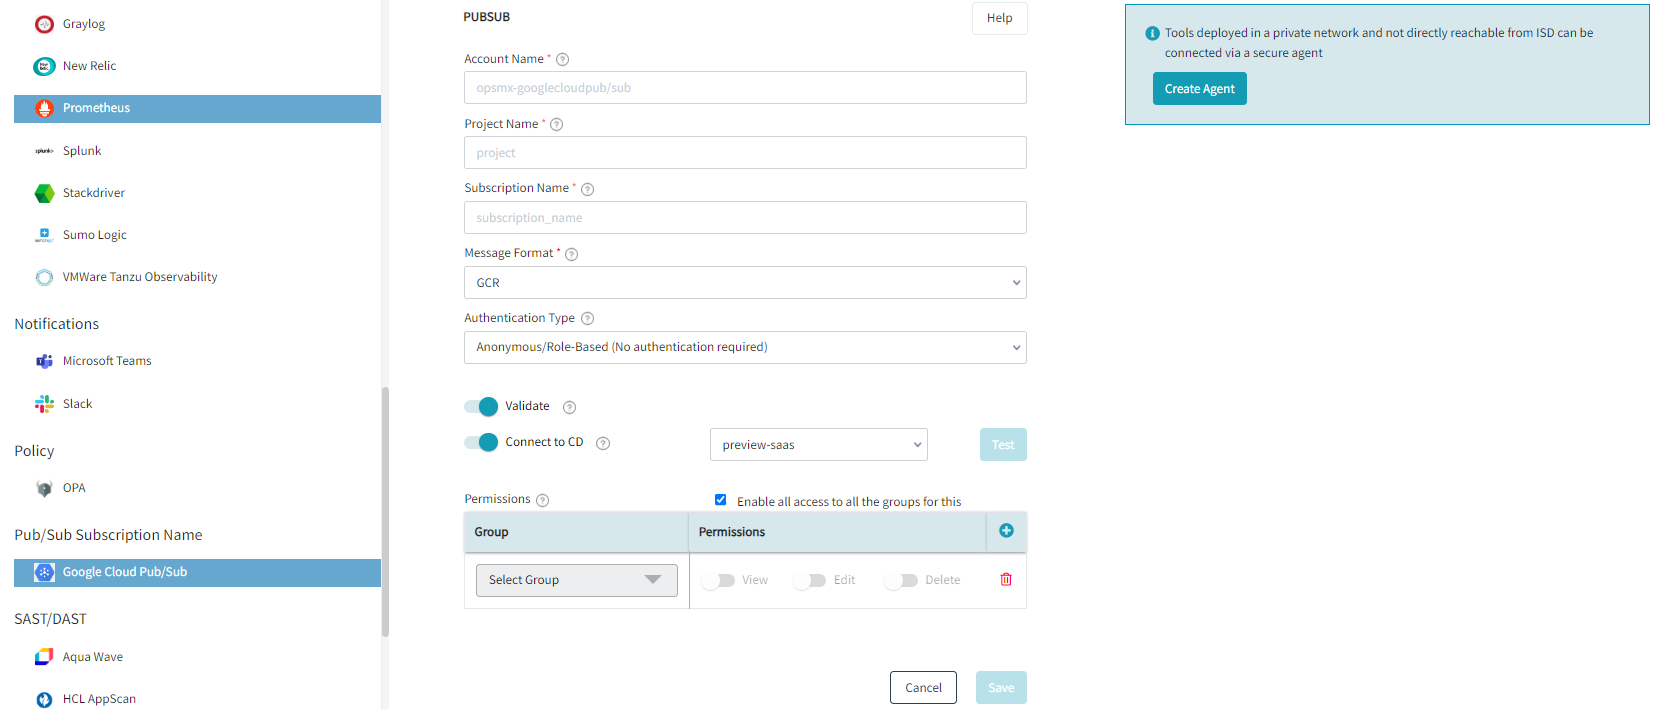
The following figure depicts the information to be provided to add PUBSUB as an integration.
Following are the fields:
* **Account Name**: The name of the Aquawave user account
* **Project Name**: Name of the GCP project where the subscription is
* **Subscription Name**: Name of the subscription
* **Message Format**: Select the message format from the drop down. The supported formats are GCB, GCS, GCR, CUSTOM
* **Authentication Type**: Select the user authentication mode for the Artifactory.
1. Select **Anonymous / Role-Based** as the authentication type if no authentication is required.
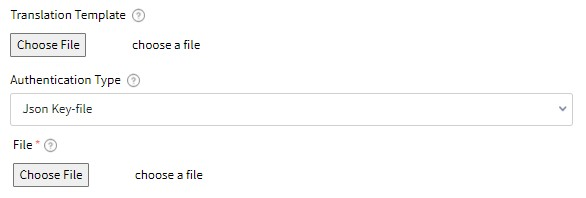
2. You can also select **Json Key File** as the authentication type. Add the JSON service account file in the **File** field for Spinnaker to use as credentials. If this option is selected another field named **Translation Template** is displayed.
3. **Translation Template** - This template translates the Pub/Sub payload as a Spinnaker artifact by creating a Jinja template. Add your file by clicking **Choose File**.
{% hint style="info" %}
The Translation Template field is optional for GCB, GCR, GCS message formats and mandatory for Custom message format.
{% endhint %}
* **Validate**: To validate the entries before saving, enable the Validate radio button. The default value is true
* **Connect to CD**: Enable the selection & Select the spinnaker instance you want to associate this account to
* **Group and Permissions**: To enable access to all user groups, check the **Enable all access to all the groups for this** checkbox. To provide access to only selected user groups, uncheck this checkbox and select the required users from the **Select Group** drop down and enable the needed permissions like **Edit**, **View** or **Delete**.