> For the complete documentation index, see [llms.txt](https://docs.opsmx.com/llms.txt). Markdown versions of documentation pages are available by appending `.md` to page URLs; this page is available as [Markdown](https://docs.opsmx.com/isd-spinnaker/opsmx-intelligent-software-delivery-isd-platform-spinnaker/release-notes/additional-resources/opsmx-argo-sandbox-guide.md).
# OpsMx Argo Sandbox Guide
### Authentication to Argo
1. You would need a valid Google/Gmail ID to log into the ARGO Sandbox environment.
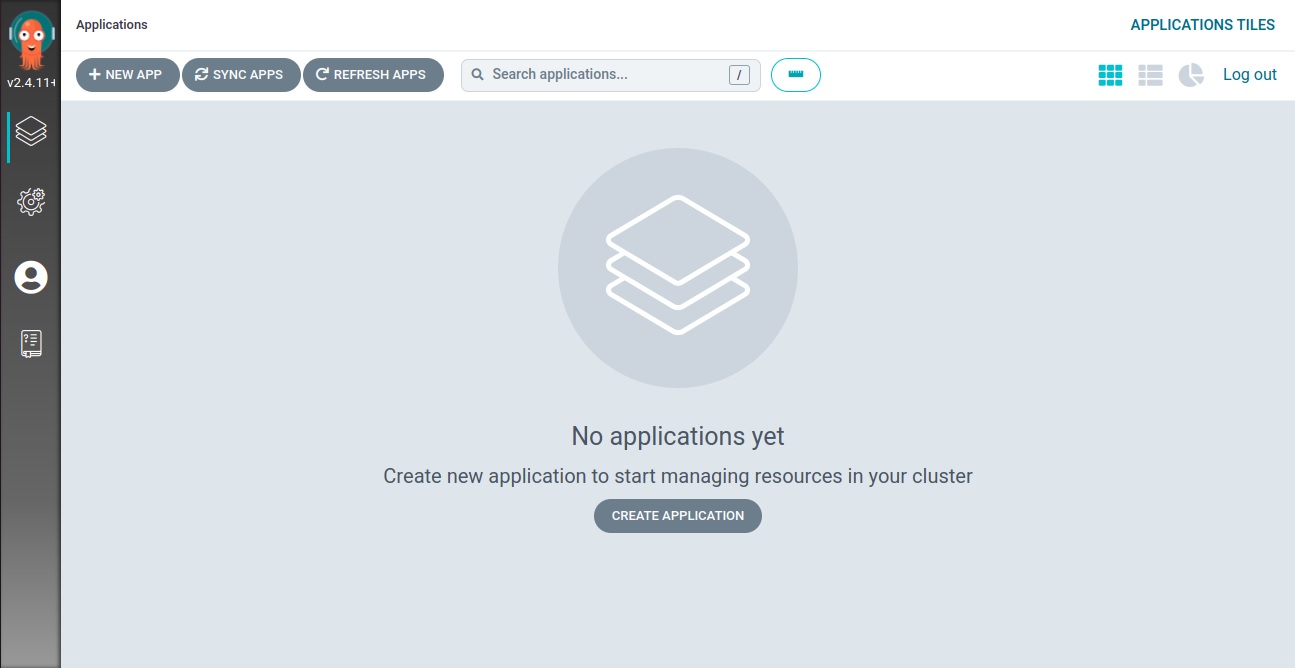
2. After a successful login, the **ArgoCD user interface (UI)** appears as shown below.
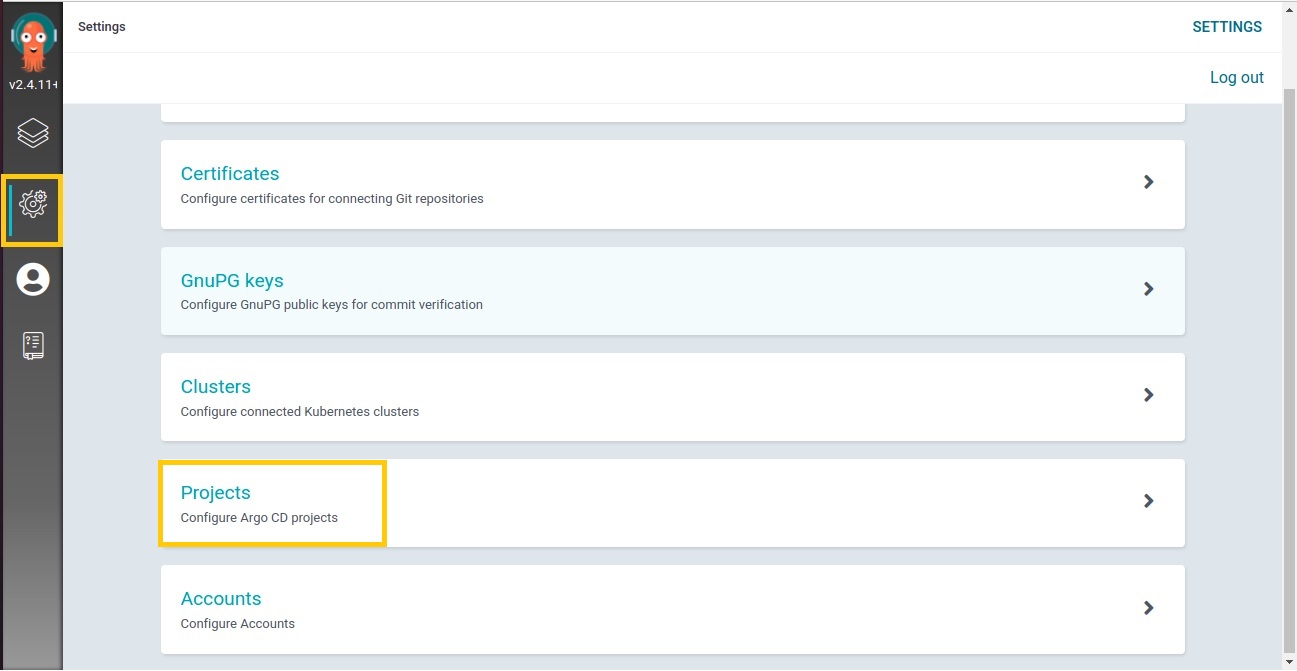
3\. The user can access project details, repositories, accounts, certifications, clusters, and other information by clicking the “**Settings**” button on the left side of the screen.
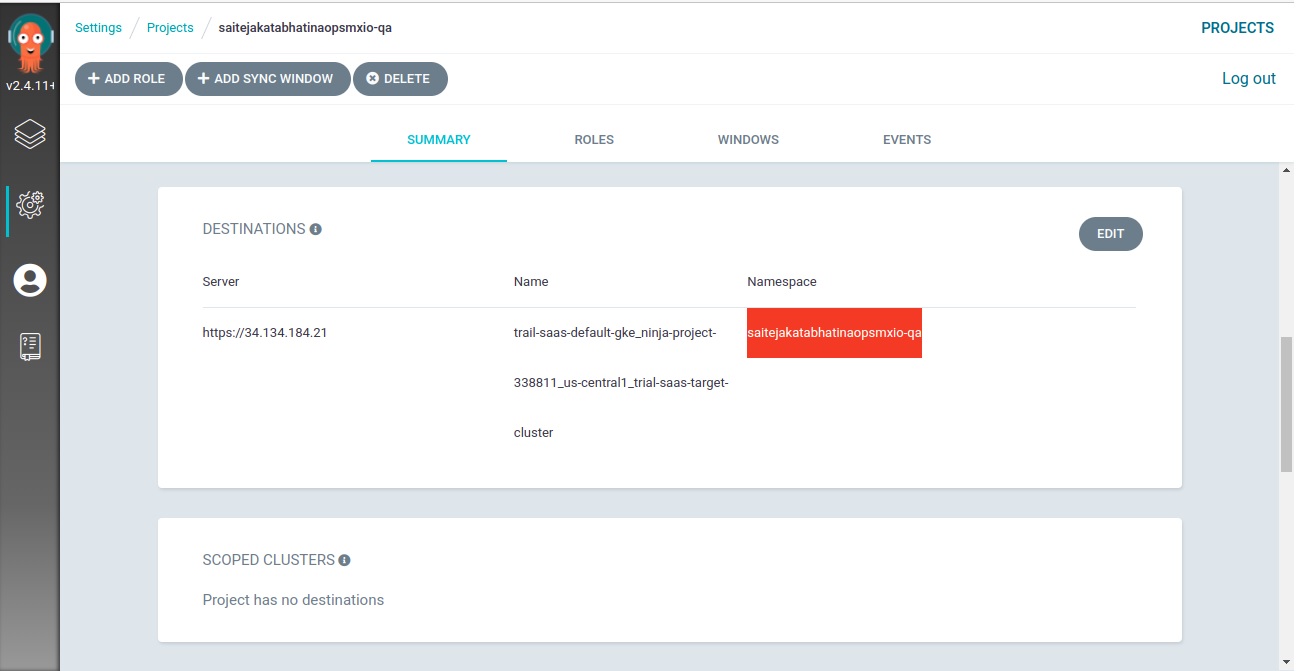
4\. By clicking the “**Projects**” tab from the screen above, the user can access the cluster and namespace details as shown below.
### **Create an Application**
Follow the steps below to create a new application in ArgoCD.
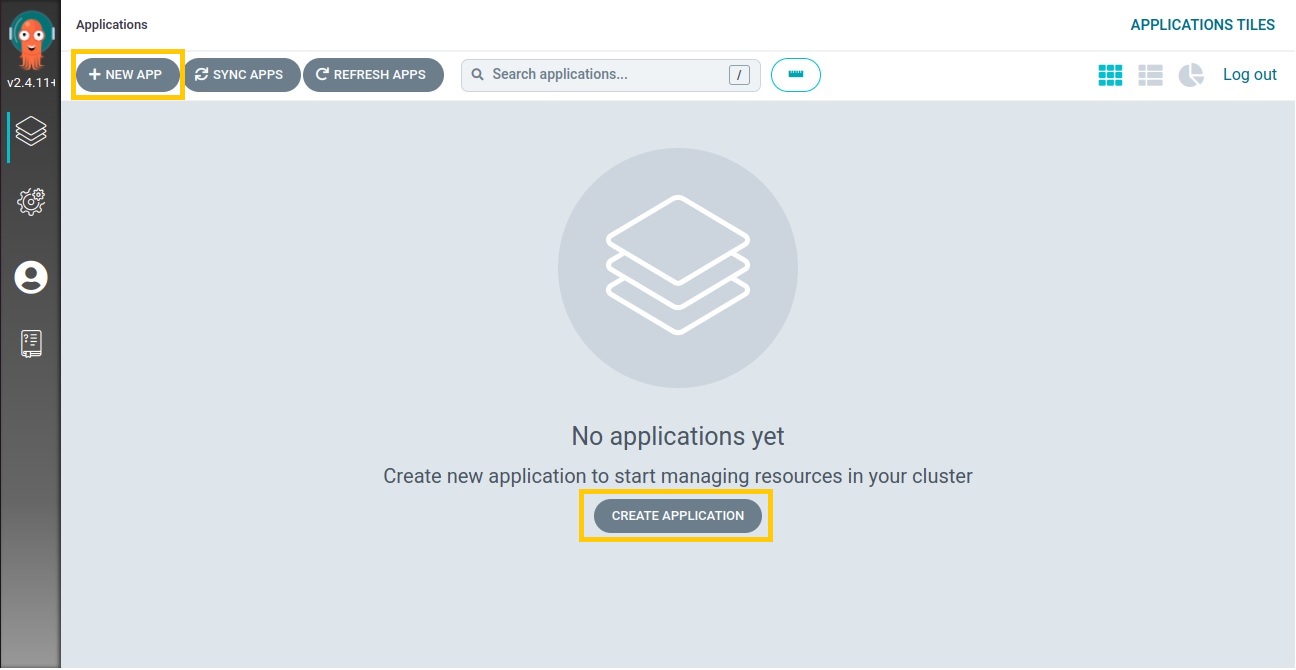
1. Click "**+NEW APP**" or "**CREATE APPLICATION**" button to create a new application in ArgoCD.
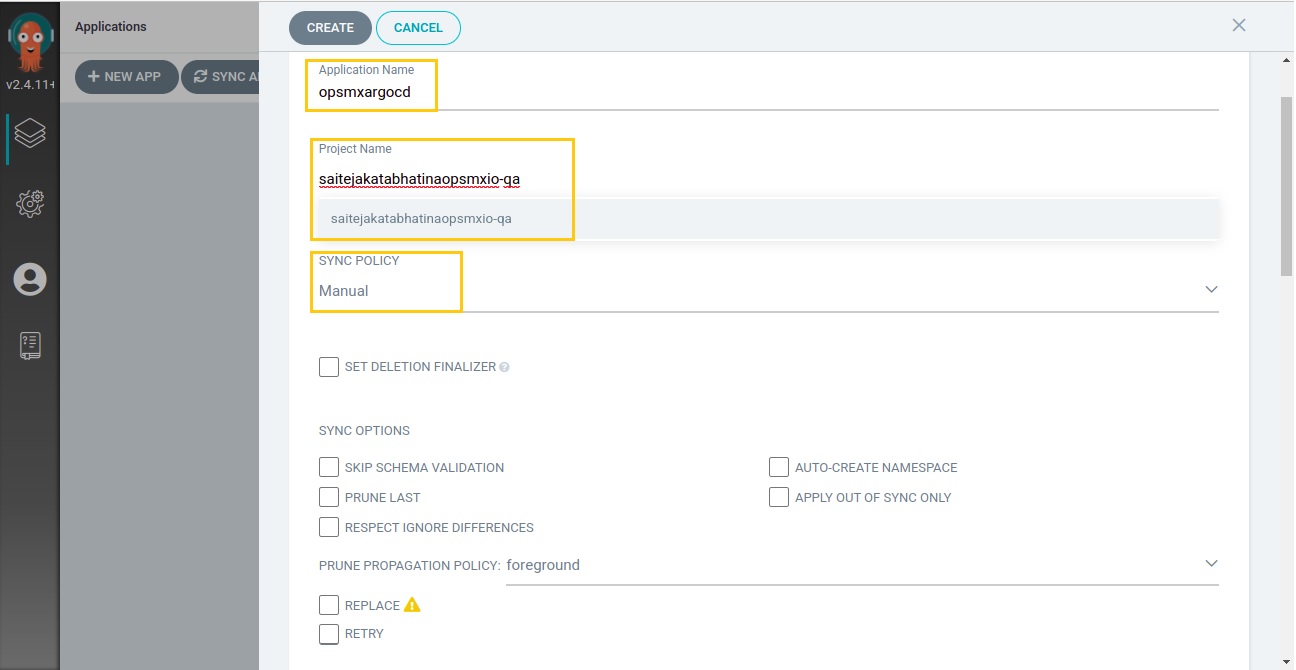
2\. After clicking "**+NEW APP**" or "**CREATE APPLICATION**" button, provide the required parameters as shown in the image below.
* **Application Name**: Provide the application name that you need to create
* **Project Name**: Click on Project name and select the project from the drop-down menu
* **SyncPolicy**: Select as Manual. (If you select automatic, all changes/commits made to the git repository will be updated automatically without any human intervention.)
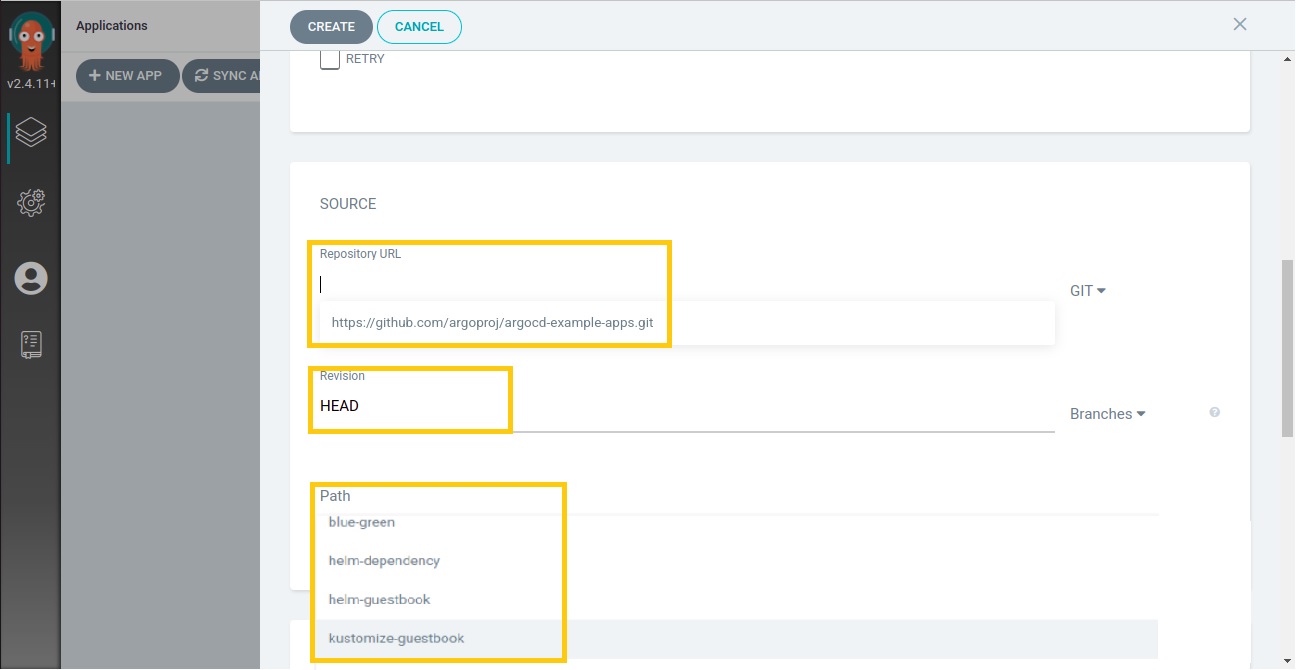
3\. Scroll down to update the "**Source**" parameters as shown in the image below.
* **Repository URL**: Click on Repository URL and select the available URL from the drop-down menu
* **Revision**: Select revision as **HEAD**
* **Path**: Click on Path and select the available path from the drop-down menu. (If paths are not highlighted check in the git repository URL)
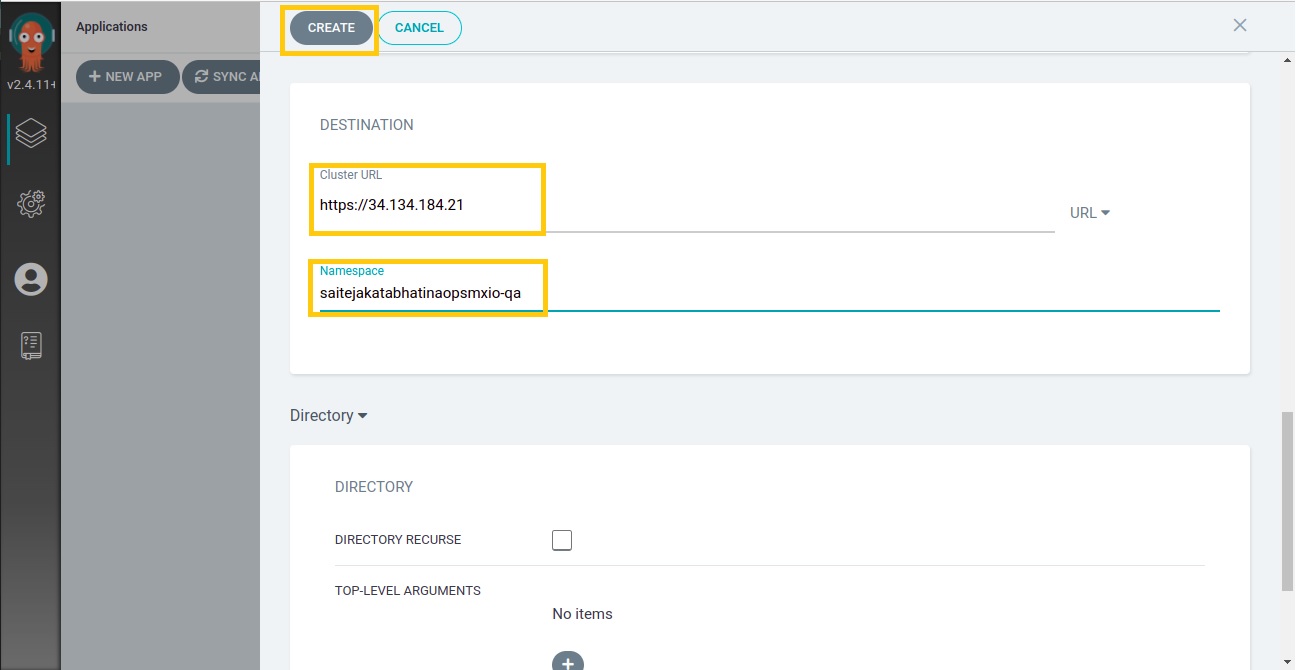
4\. Scroll down to update the "**Destination**" parameters as shown in the image below.
* **ClusterURL:** Click on Cluster URL and select the available URL from the drop-down menu
* **Namespace**: Namespace value can be taken from project details as mentioned in [Create an Application](#creation-of-application) section step 4.
* After updating the above parameters click "**CREATE**" button to complete the application creation.
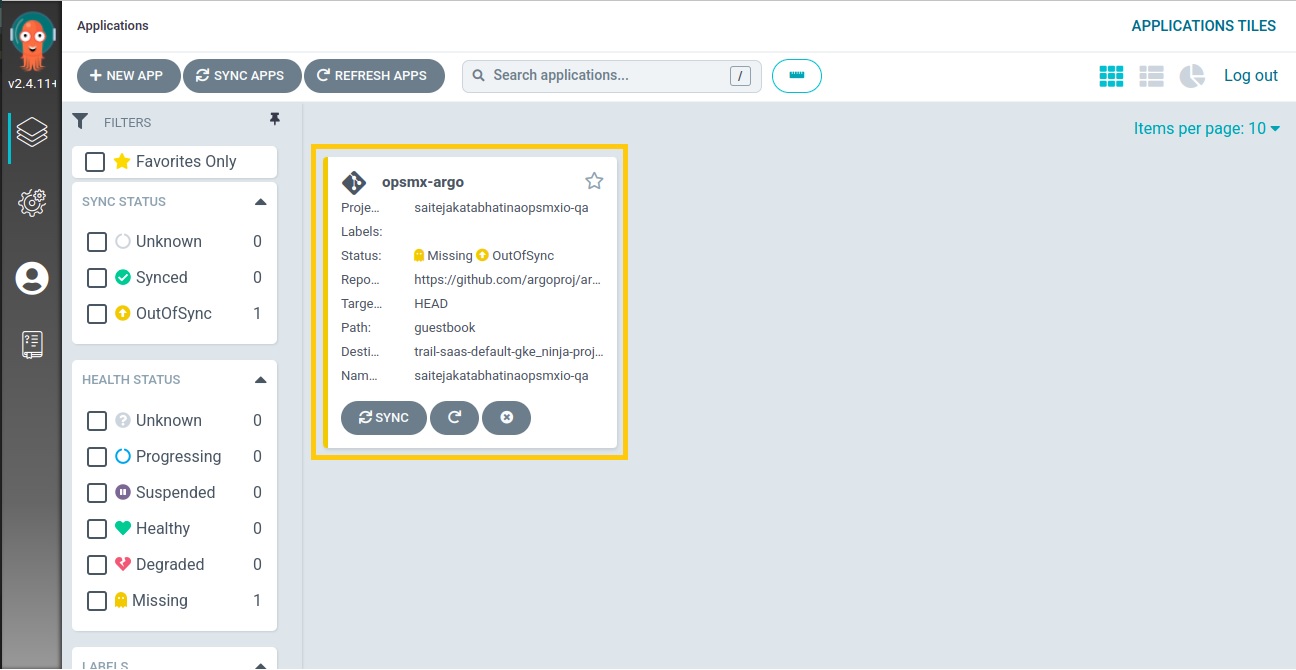
5\. After clicking the "**CREATE**" button, your application will be created in ArgoCD UI as shown in the image below**.**
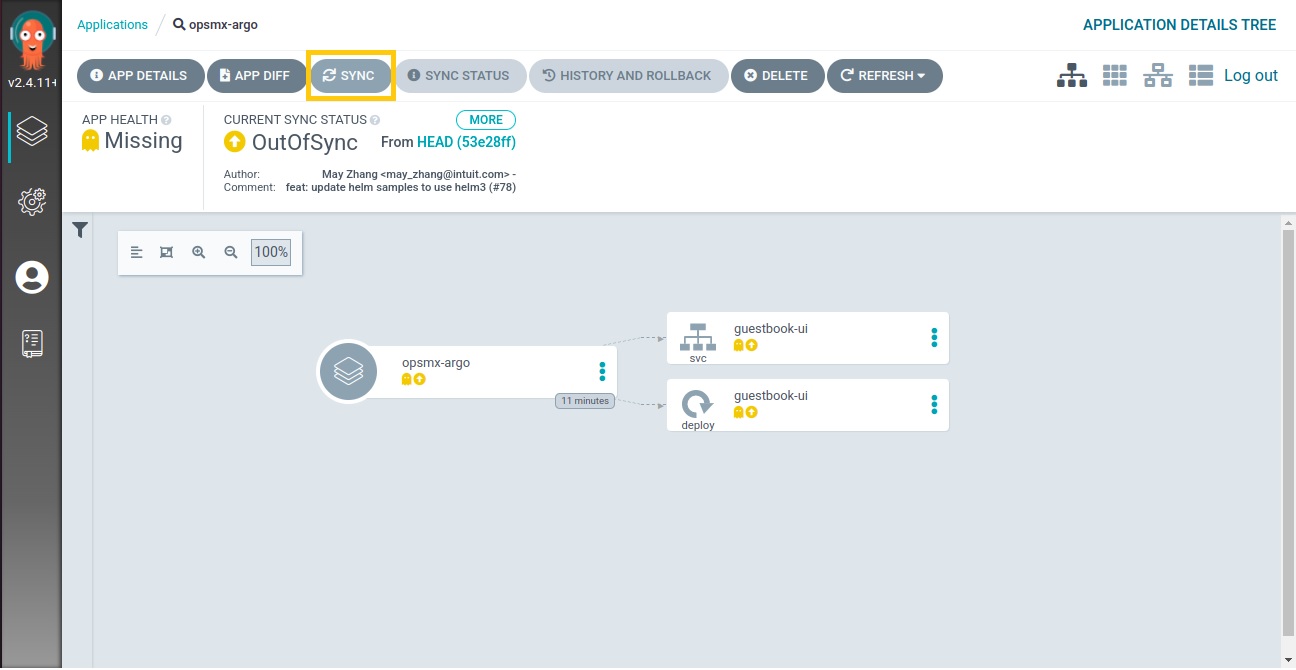
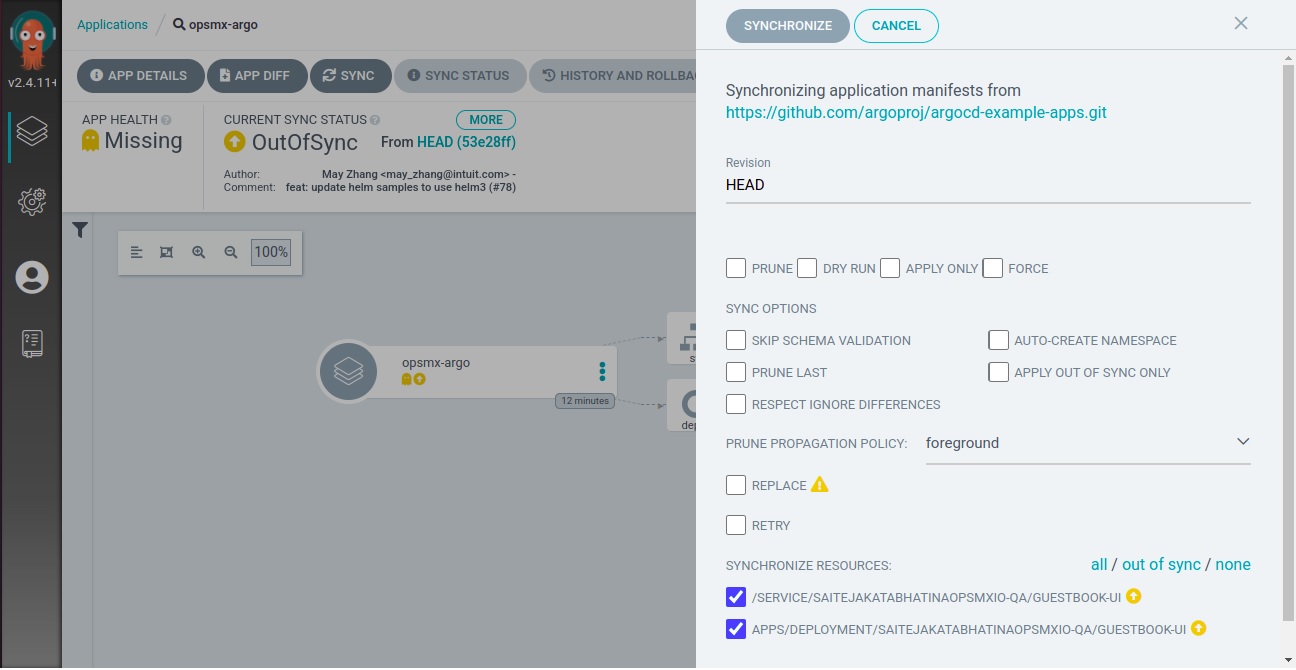
6\. After create an application, click on the application to get a Synchronize option and then click "**SYNC**" button.
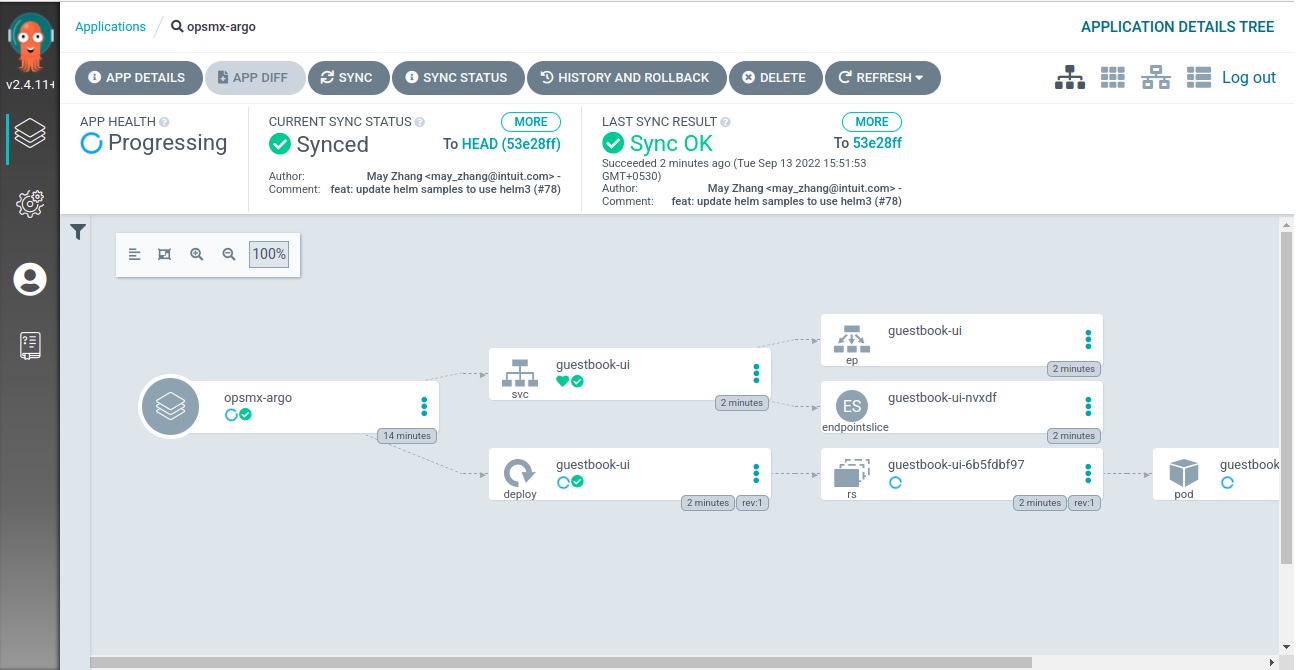
7\. After you click the "**Sync"** button, the application will be synced and deployed into the target cluster, which is the namespace that you specified when you created the application.
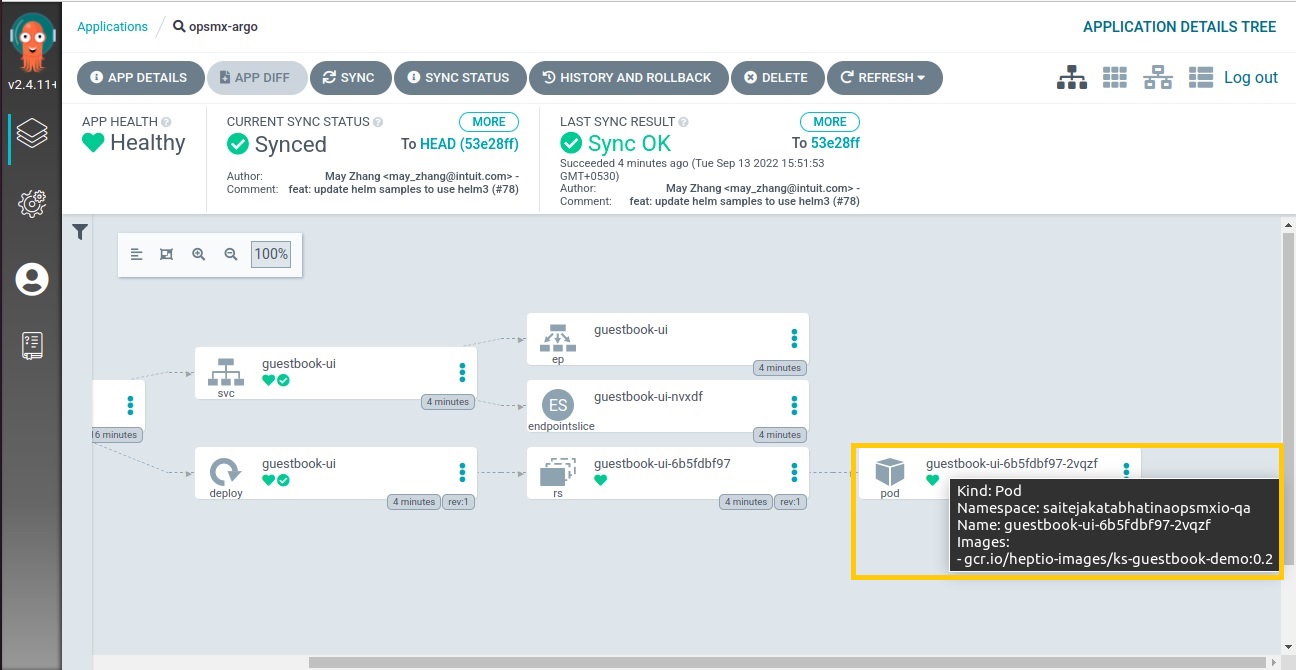
8\. After a successful sync, the application health will be updated as shown in the image below.
### **Verification**
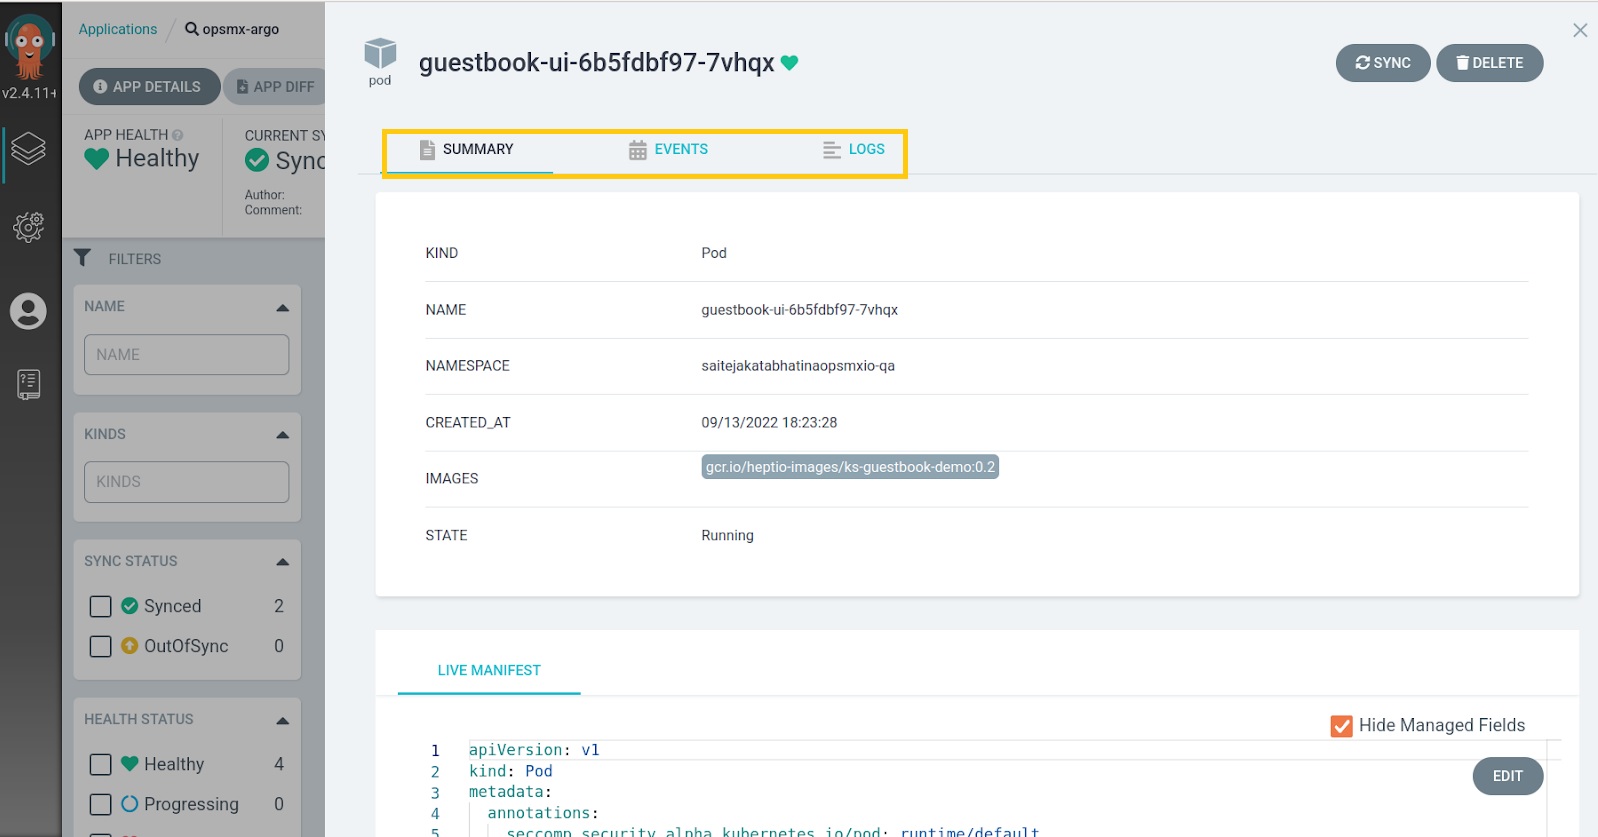
1. Click on the **"Pod"** to perform the verification.
2\. Pod detail window displays a summary, events, and logs.
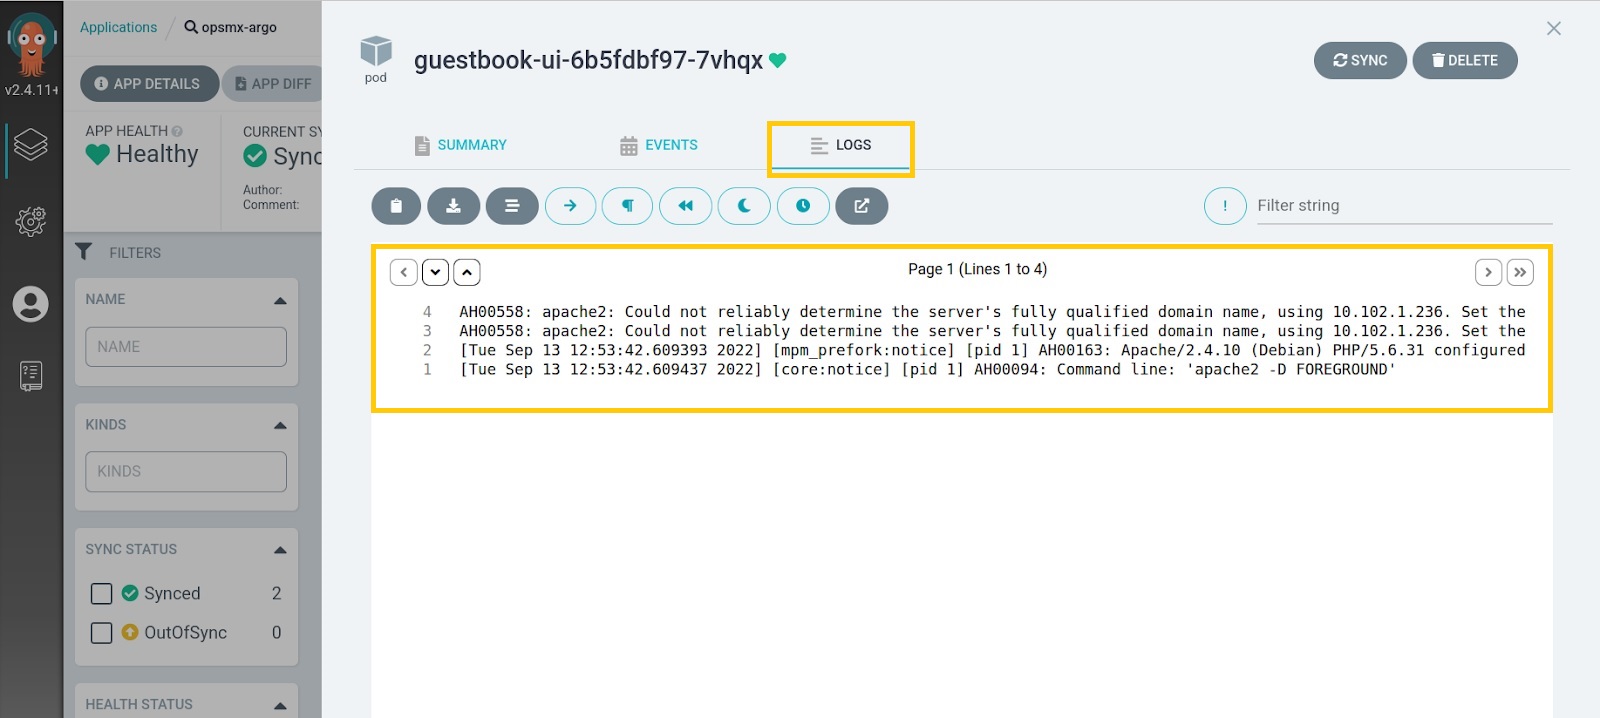
3\. Click on logs to see the pod logs.