> For the complete documentation index, see [llms.txt](https://docs.opsmx.com/llms.txt). Markdown versions of documentation pages are available by appending `.md` to page URLs; this page is available as [Markdown](https://docs.opsmx.com/integrations/integrating-ci-and-cd-tools/gitlab-container-registry.md).
# Gitlab Container Registry
**GitLab Registry** (GitLab Container Registry) is GitLab's built-in Docker container registry, allowing teams to store, manage, and version container images alongside their source code repositories.
#### Usage of Gitlab Container Registry in Delivery Shield
* Delivery Shield integrates with GitLab Container Registry to scan container images for vulnerabilities before and after deployment.
* Image scan results are correlated with your application's pipeline and repository data, contributing to the overall security score and unified dashboard visibility.
#### To Integrate Gitlab Container Registry:
1. Navigate to **Setup** > **Integrations**.
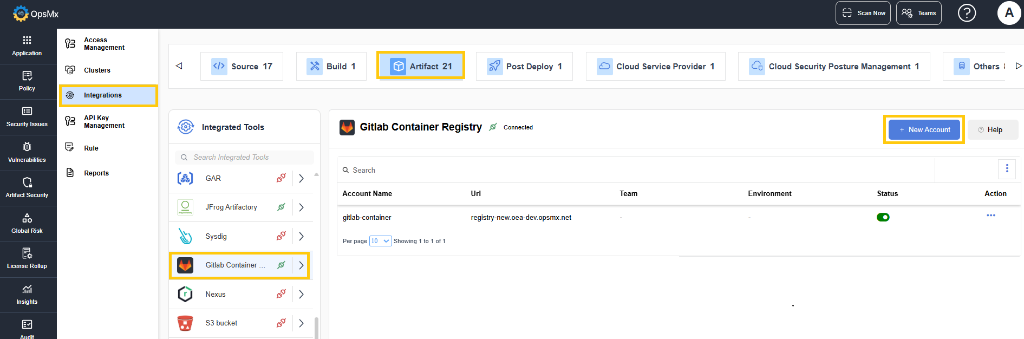
2. In the **Artifact** panel, click **Gitlab Container Registry**.
3. The Gitlab Container Registry integration page is displayed. Click **+New Account**.
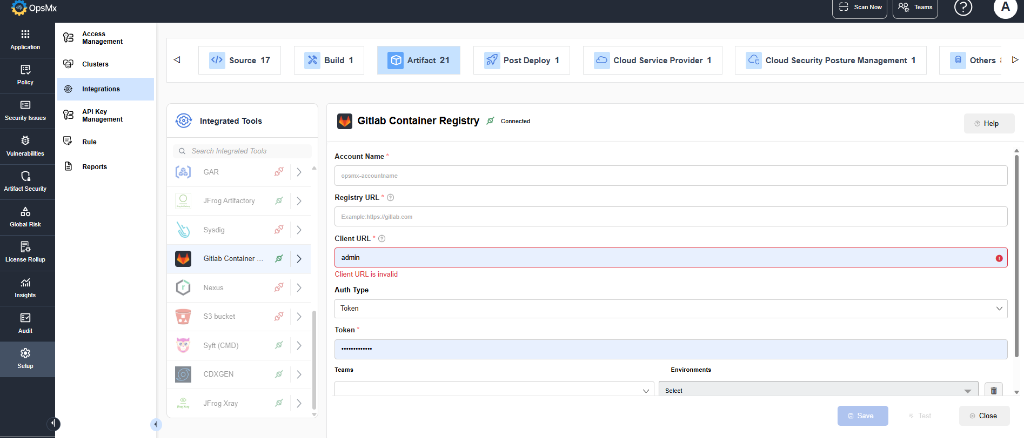
4. In the popup that appears, enter the following details:
5. Enter the **Account Name**, **Registry URL**, **Client URL**, **Auth Type**, and **Token** of your Gitlab Container Registry account.
6. Select the **Teams** and the corresponding **Environments** from the dropdown for which you want the integration to be available. The integration will be available for the selected teams and environment only.
You can select up to 5 teams for the integration to be displayed.
* An example is given below for reference:
* In the example above,
* if **Team 1**, **Team 2**, and **Team 3** are selected, only applications associated with these teams can access the integration. Any applications belonging to other teams, such as **Team 4**, will not have access to this account.
* Even if the user who created this account is also an admin for **Team 4**, the integration account remains restricted and is not available for **Team 4**.
* Access to the account is strictly limited to the specified **Teams** and **Environments** selected during account creation.
* **For Organization Admins:**
* When an **Organization Admin** creates an account without selecting specific **Teams** and **Environments**, the account will be universally applicable, granting access to **all teams** and **all environments** by default.
* **For Team Admins with Multiple Teams:**
* If a **Team Admin** who manages multiple teams creates an account without specifying particular **Teams** and **Environments**, the account will only be accessible to the teams for which the logged-in user holds admin privileges.
7. Click **Save**. The tool is connected.
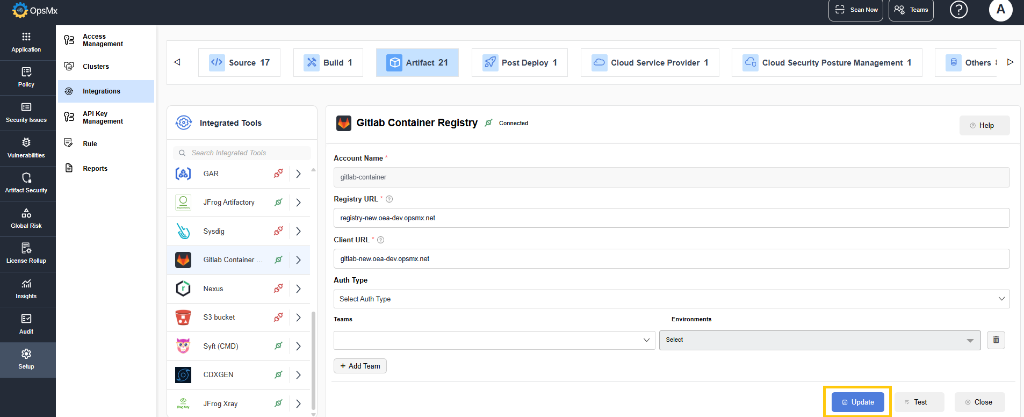
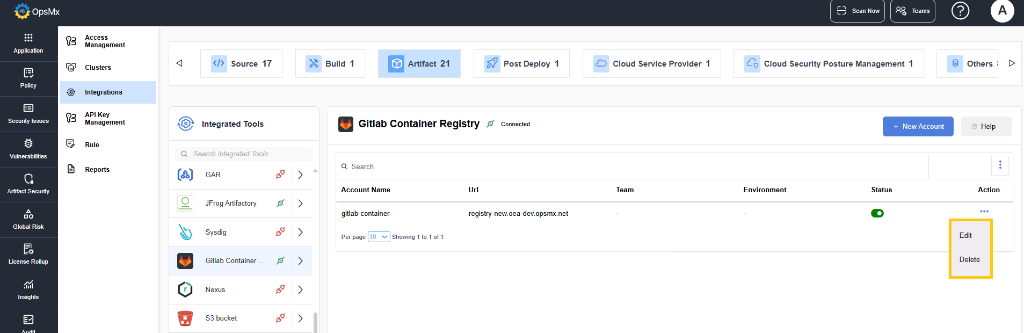
8. You can edit the entered values by clicking the **Edit** option as shown below:
9. Enter the new values and click **Update**.
The new values get updated.