> For the complete documentation index, see [llms.txt](https://docs.opsmx.com/llms.txt). Markdown versions of documentation pages are available by appending `.md` to page URLs; this page is available as [Markdown](https://docs.opsmx.com/code-to-cloud-security-and-scanners/container-and-artifact-security/image-scanning/how-to-do-mobile-scan.md).
# How to do Mobile Scan
The Mobile Scan scans mobile application artifacts stored in artifact repositories such as JFrog Artifactory and Google Cloud Storage (GCS). The scanning process analyzes mobile binaries — APKs (Android) and IPAs (iOS) — for vulnerabilities, misconfigurations, and security risks before they reach production.
By integrating OpsMx Delivery Shield with your artifact repositories, you gain continuous, automated mobile application scanning that strengthens the security of your software delivery pipeline. Regular scans, detailed reporting, and seamless integration with your existing artifact management tools ensure that your mobile applications are built and shipped with security at every stage.
This page explains the process of Mobile Scan for **Jfrog Artifactory** platform.
* Before starting with the scan, you need to integrate Jfrog Artifactory with the OpsMx platform. Follow the steps provided in [Integrating JFrog Artifactory](/integrations/integrating-ci-and-cd-tools/jfrog-artifactory.md) to complete the process.
* Once the GCS platform is connected to OpsMx you can start with the Mobile scan.
### To Access Mobile Scan
* Navigate to **Scan Now** > **Mobile Scan**.
Now you can **Add Project, Upload Project** or **Sync Project** to proceed with the scan.
### To Add a Project
* To add or update a new project with source scan configurations, for scanning, click **Add Project**.
* The **Create Project** details page is displayed as shown below. Enter the details for the following fields:
* **Name (mandatory)** : Enter a name for the project.
* **Team** : Select the team for which you want to create the project.
* **Scan Type (mandatory)** : The default type is Source Scan.
* **Platform (mandatory)**: Select the platform type GCS or Jfrog Artifactory for the project.
* **Account** : Choose the needed account that has been integrated for the selected platform. If no account is available for the selected platform then click **Add Account**.
* The integration page is displayed. You can add a new account.
* **Organization / Workspace** **(mandatory)**: Choose the organization or workspace that the selected account has access to.
* **Scan Level (mandatory)** : Select the scan level; either organization level or repository level that needs to be scanned.
* **Configuration** : Set the configuration details, and schedule the auto scan time.
* **Mobile Artifact Name (mandatory)** : Select the repo or project name for which the scan needs to be executed.
* **Mobile Artifact Tag (mandatory)** : Select the branch name for which the scan needs to be executed.
* **Tags/ Files Pattern** : Select the branch pattern for which the scan needs to be executed.
* **Scan Upto (mandatory)**: Select the branch limit for which the scan needs to be executed. (number of branches to be scanned)
* **Schedule Auto Scan** : Select the time range during which the scan needs to be rerun automatically.
* Click Save.
The project gets added for scanning.
### To Upload a Project
* To upload a project from your local, for scanning, click **Upload Project**.
* Click **Upload File** and select the APK & IPA files that you want to add for scanning.
* Click **Save**.
The file gets added for scanning.
### Saving Configuration
* After adding the configuration details you can click the **Save Configuration** option to save the adding details and trigger the scan at a later period.
* The added project displays in the list with a **Paused** scan status.
* When you want to scan the saved project you can click the Trigger Scan option to initiate the scan.
### To Integrate JIRA at Project Level
JIRA can be integrated at project level to create tickets whenever an alert is identified.
* To integrate JIRA, click the Integrations icon on expanding the project.
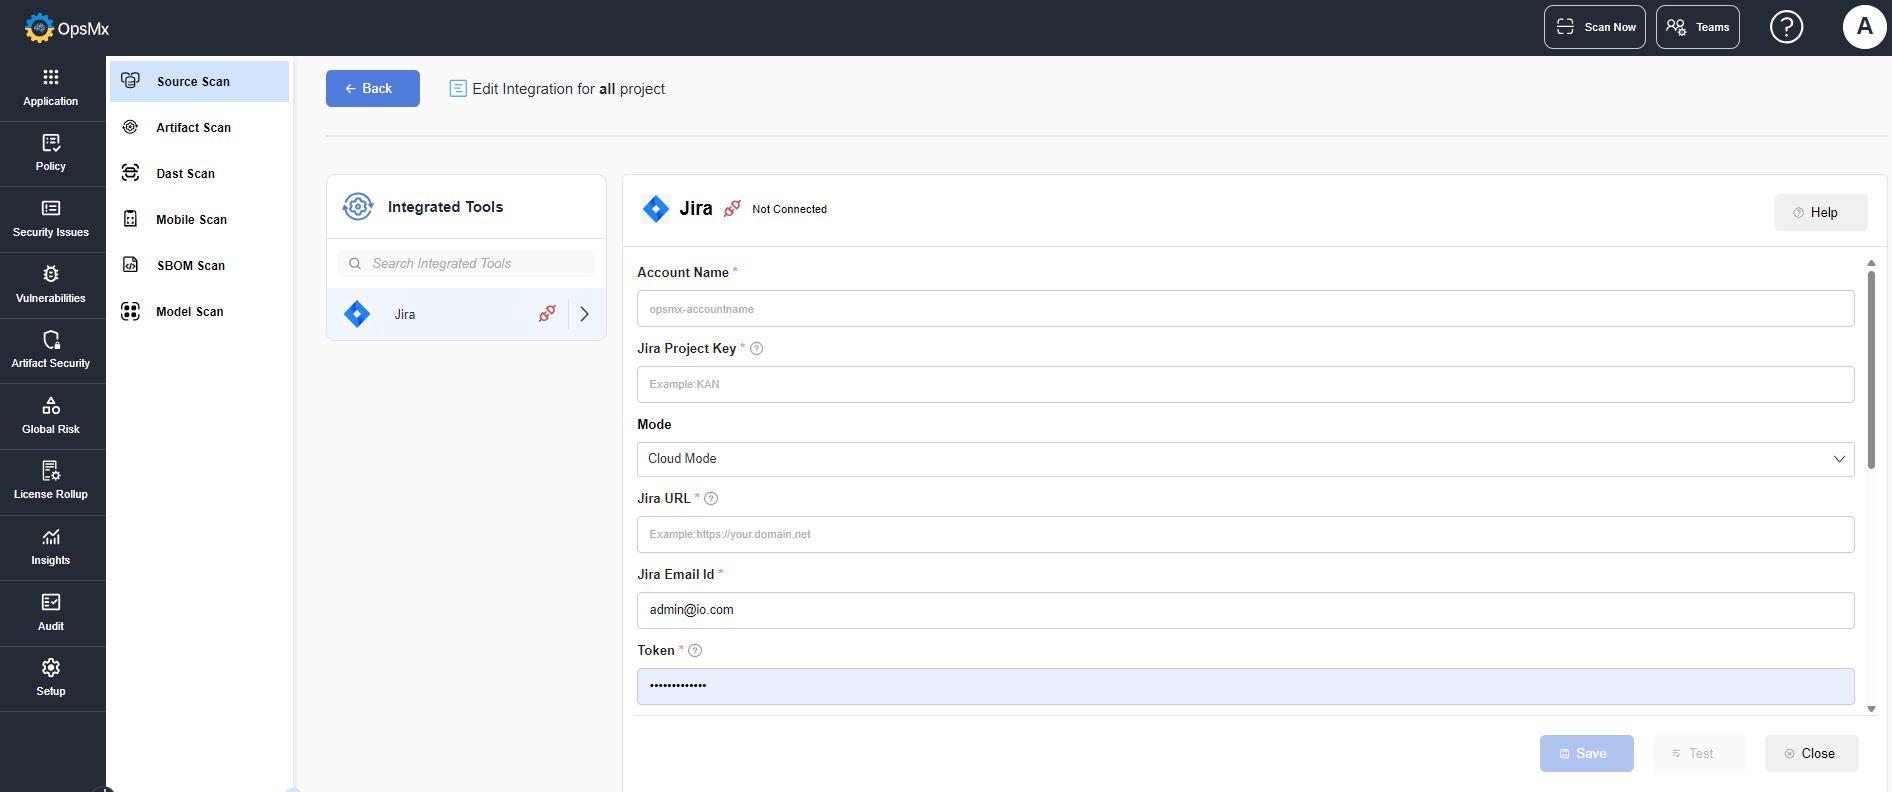
* The JIRA integration page is displayed. Click **Add Account** and enter the details.
* Enter the values for the following fields:
* **Account Name -** Enter the JIRA account name.
* **Jira Project Key -** Enter the name of your Jira project.
* **Jira** **URL -** Enter your Jira host Url
* **Jira Email Id -** Enter the username to access Jira.
* **Token -** Enter the password / token for the Jira account.
* Enable **Automatically create Jira tickets during the scan** to create JIRA ticket to the team owner when the alerts are identified.
* **Trigger Type** - Indicates at which level Jira tickets should be created.
* **Create Jira ticket at the Component Alert level** - Jira tickets will be created for each individual impacted component.
* **Create Jira ticket at the Deduplication Alert level** - A single Jira ticket will be created for all the impacted components.
* **Creation Scope** - If Vulnerabilities is selected, Jira is created only for Critical and High alerts. If All Policies is selected Jira is created for all alerts.
* Enable **Assign the Jira ticket to the Team owner** if you want to assign the ticket to the team owner.
* **Fields -** Enter the labels that need to be added in the created Jira ticket.
* **Values -** Enter the values that need to be given in the Jira ticket. The given variables are replaced with actual values when the tickets are created.
* **Status Keyword Mapping** - You can set the keywords for the status.
* Click **Test** to check if the entered values are valid.
* Once validated, click **Save**. The tool is connected.
### To View and Interpret Scan Results
Once the scan is complete, OpsMx generates the overall results and they are displayed as shown below:
* Repos Registered
* Total Branches
* Total Scans
* Total Projects
* Auto Scan Enabled Repos
{% hint style="info" %}
Enable the **Latest Scan** toggle button to view only the most recent scans.
{% endhint %}
* The panel at the bottom displays the project details. On expanding each project you can view the complete details of it.
* Click **View Reports** to view the various reports related to the scan.
{% hint style="info" %}
The current status of the scan (completed, pending or failed) is displayed to notify the status of the project.
{% endhint %}
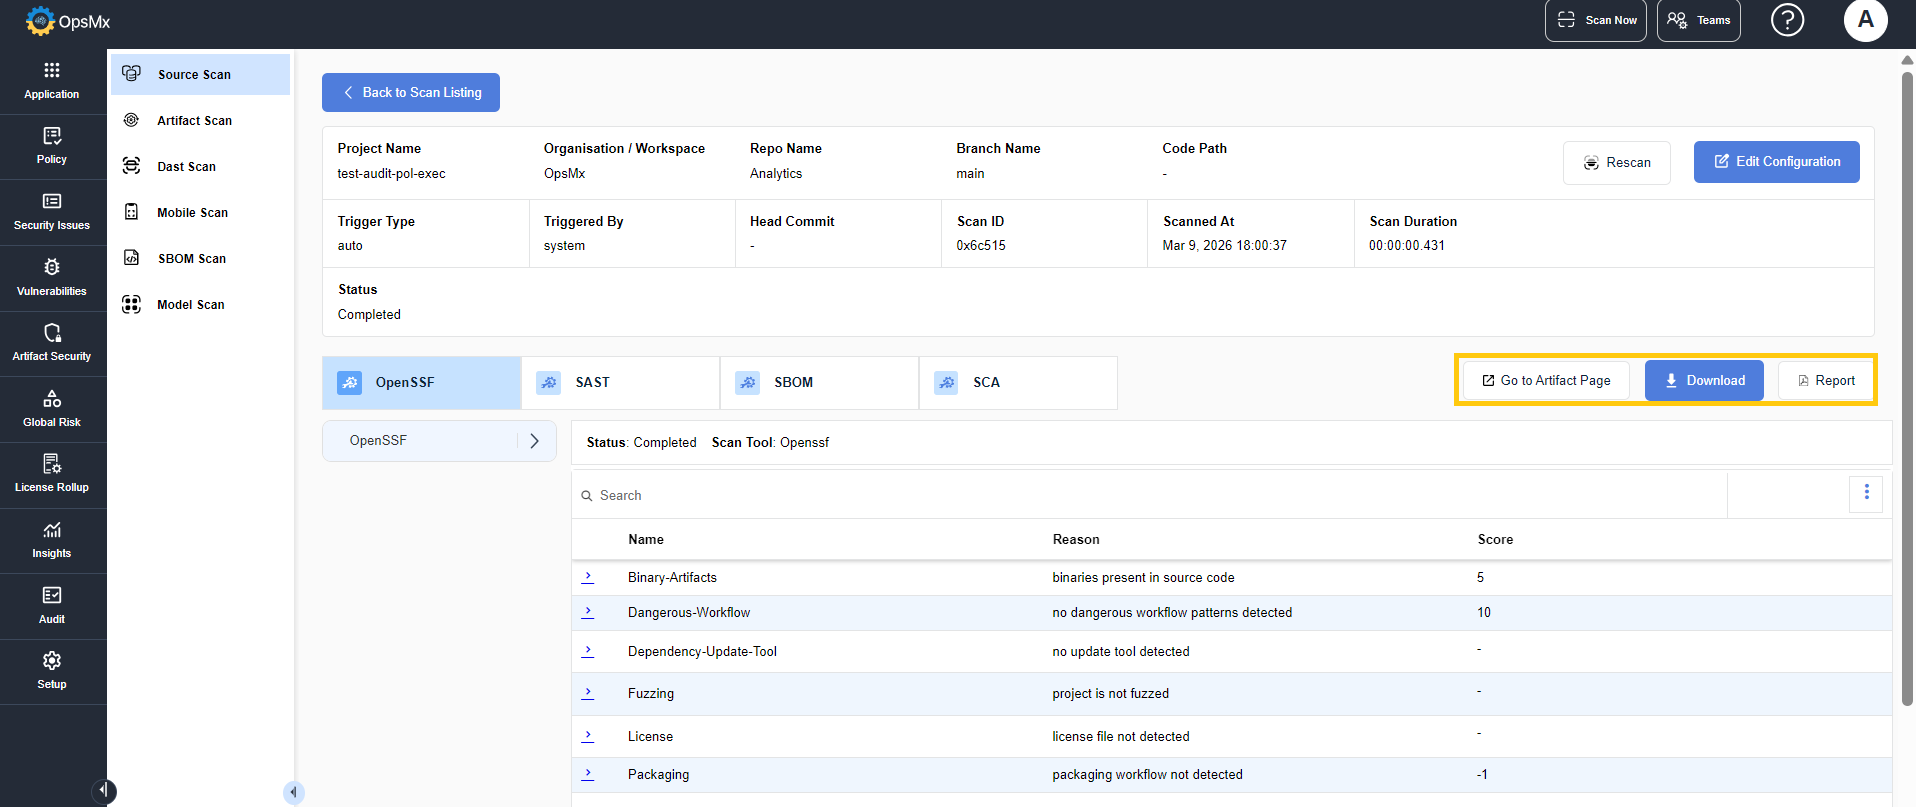
* The page displays the findings for each scan. Click on the appropriate tab to view the results.
* On clicking the **Download** button, the scan results are downloaded in .json or .csv format.
* On clicking **Report**, the scan results are downloaded in a report format.
* On clicking **Go to Artifact** Page, you are redirected to the [Mobile Artifacts](https://docs.opsmx.com/code-to-cloud-security-and-scanners/artifact-security/mobile-artifacts) page.
### Quick Actions
Each project displays 5 quick action buttons as shown:
1. **Trigger Scan** – Initiates a new scan for the project or runs a scan using a previously saved configuration.
2. **Integrations** – Opens the project's **Integrations** page, where all available integrations for the project are listed.
3. **Policies** – Displays the list of policies that have been configured for the project.
4. **Edit Project** – Opens the project configuration settings, allowing you to modify the project's details and scan settings.
5. **Delete** – Removes the project from the system.
### Best Practices
To get the most out of OpsMx Delivery Shield Source Scan, consider following these best practices:
* **Frequent Scanning**: Run the scans regularly (e.g., after each commit or weekly) to detect the vulnerabilities early.
* **CI/CD Pipeline Integration**: Incorporate source scanning into your continuous integration/continuous deployment pipeline to identify the issues before they go live.
* **Alerts and Notifications**: Set up alerts to notify your team when critical vulnerabilities are detected, to address them promptly.
* **Fixing Issues in Advance**: Address vulnerabilities as soon as they are found to prevent issues from piling up.